202 - Sponsor Quick Start Guide
Keeping track of meals and claims has become a simplified and streamlined process with Cartewheel Meal Counter. Our comprehensive platform allows for accurate SFSP data to be readily available in “real time” for review and claim submissions. We have created this Quick Start Guide to provide you clear directions at a glance.
Before going forward, confirm your Meal Counter account. Please note, sponsor users can be created in two ways: within the state's School Nutrition Technology System (SNTS) (see 201A or 201B: for GA-DECAL) or within Meal Counter by a Sponsor at your organization or State Agency user (see the "Sponsor Users Section" in this guide).
Sponsor Demonstration
Sponsor Dashboard
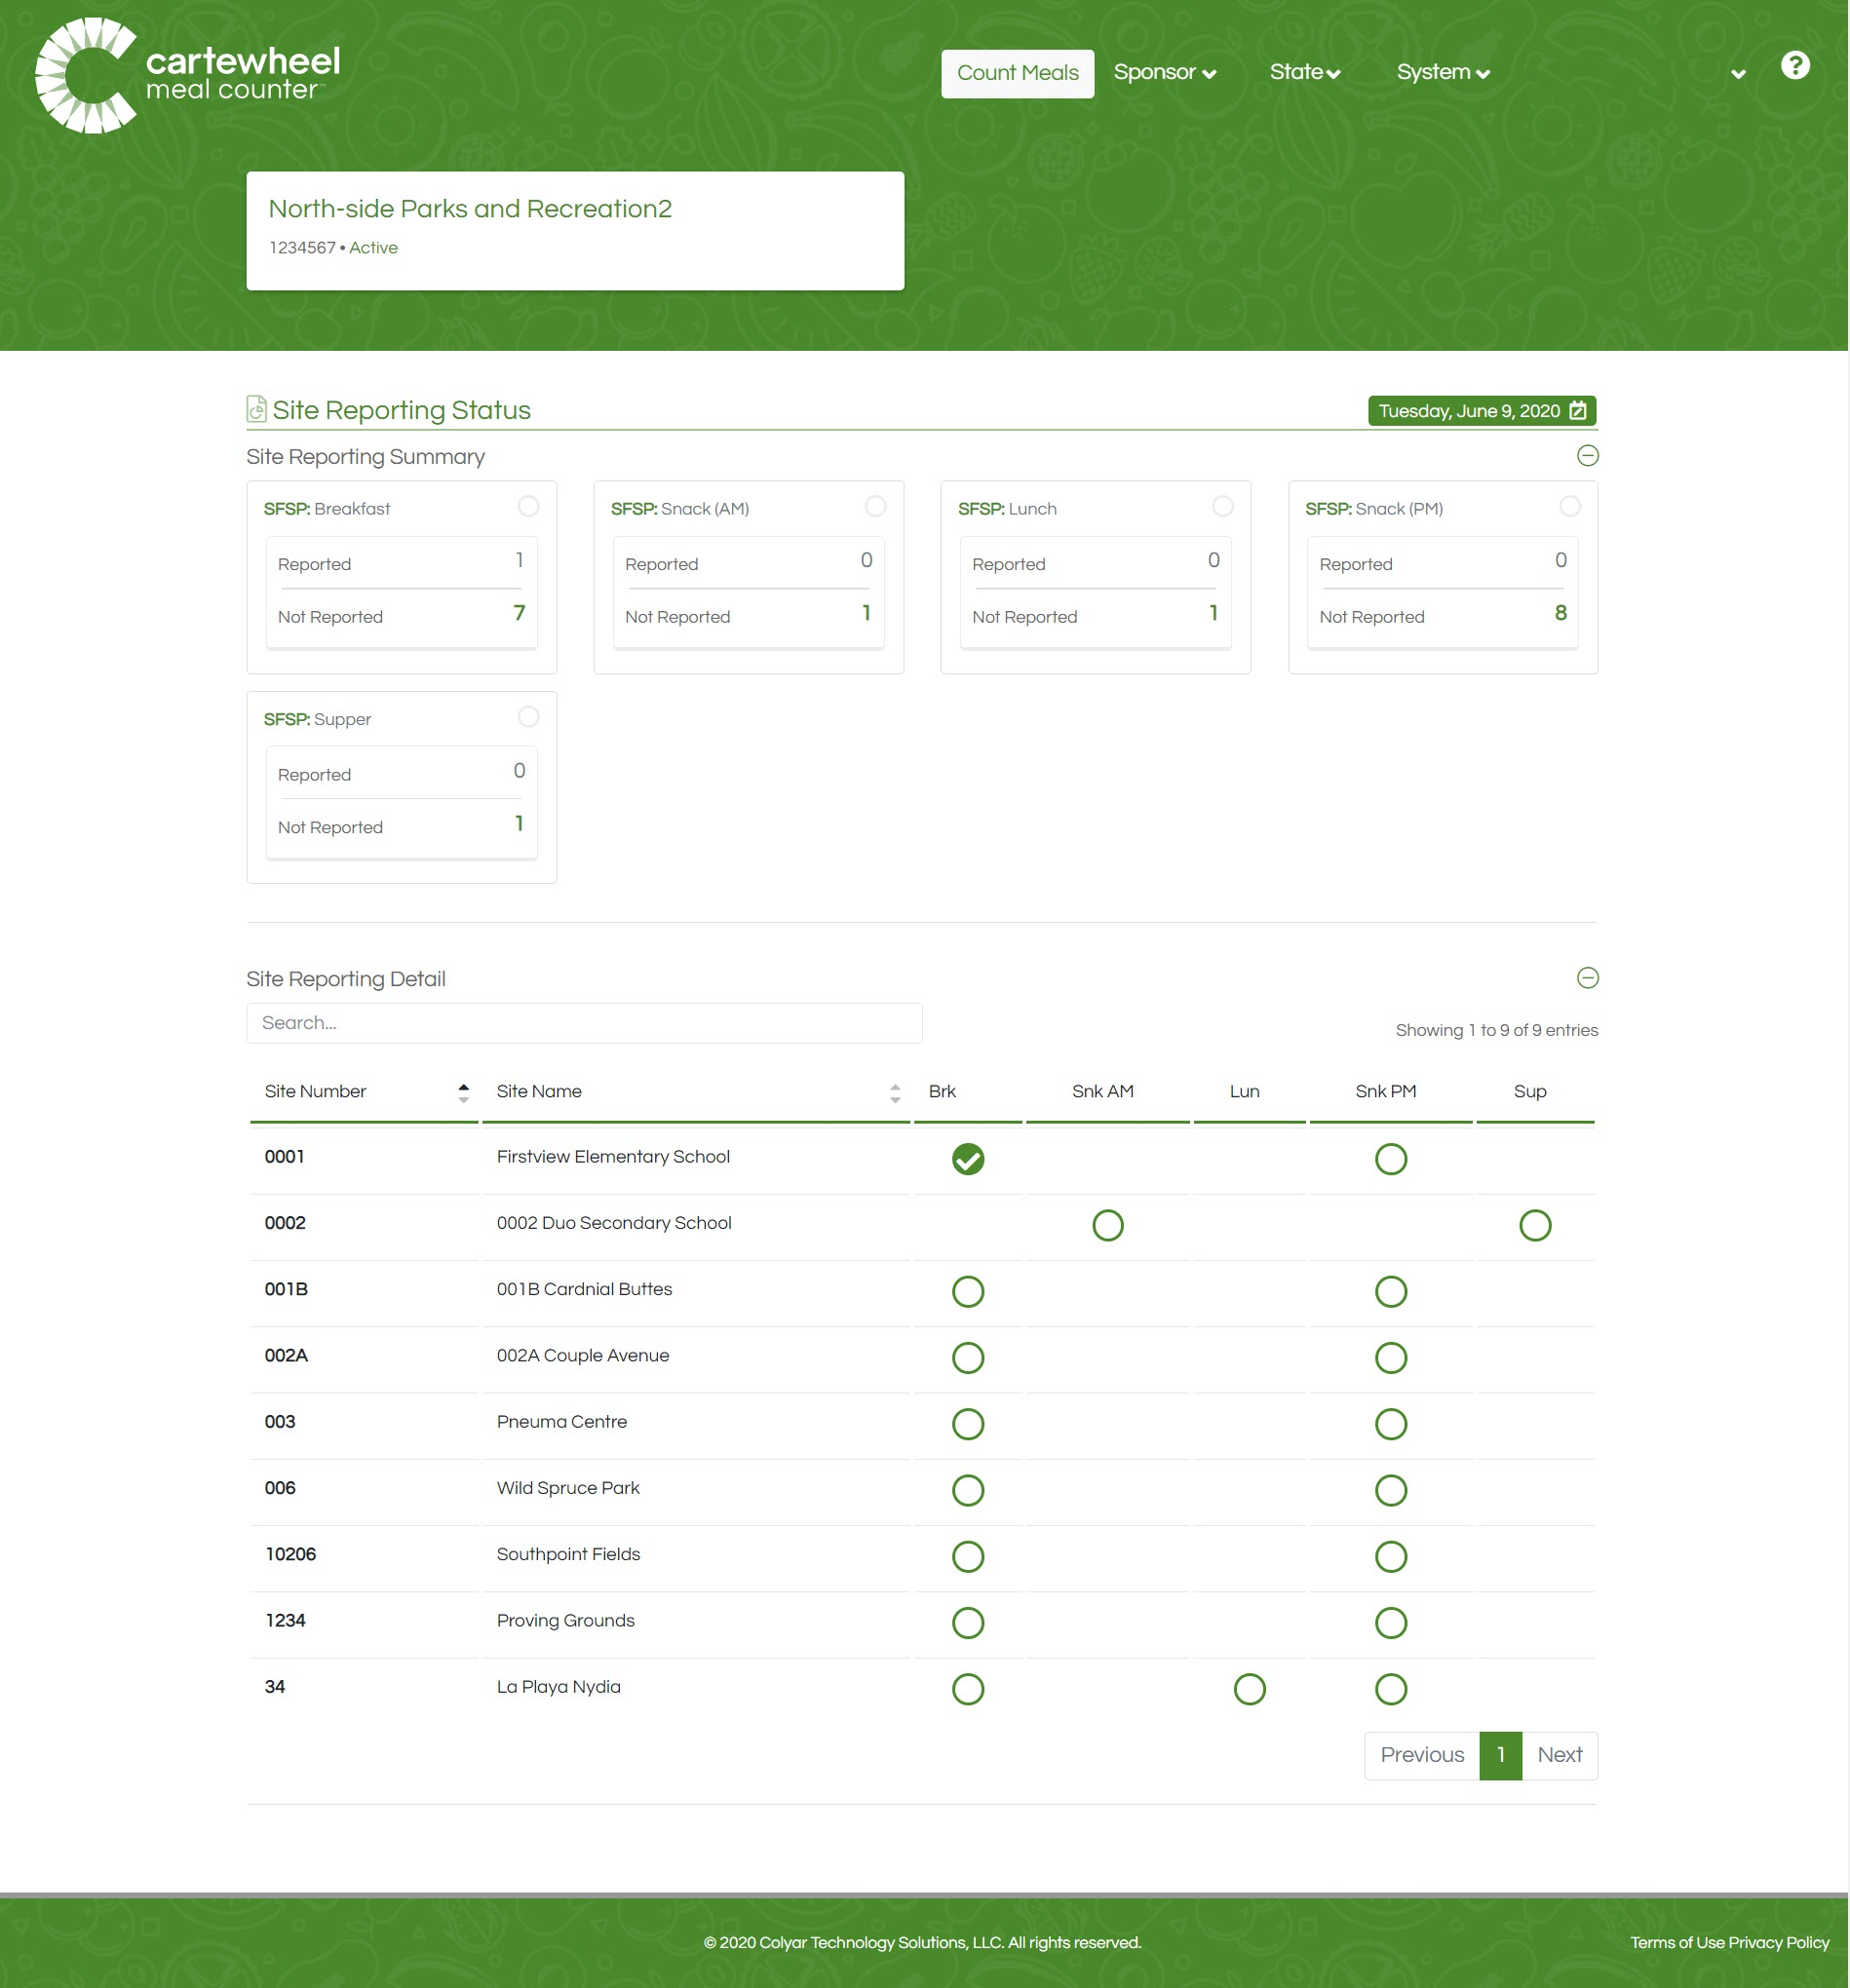
The Site Reporting Status page displayed when you first log in functions as your daily dashboard for keeping track of receiving Meal Counts. This page lets you readily identify unreported meals and provides a visual breakdown, by site and meal type, of all the meals scheduled for the selected date along with their current status.
View Not Reported Sites
In the ‘Site Reporting Summary,’ click on the numeric link to view a list of ‘Not Reported’ sites by meal type.
Meal Count Statuses
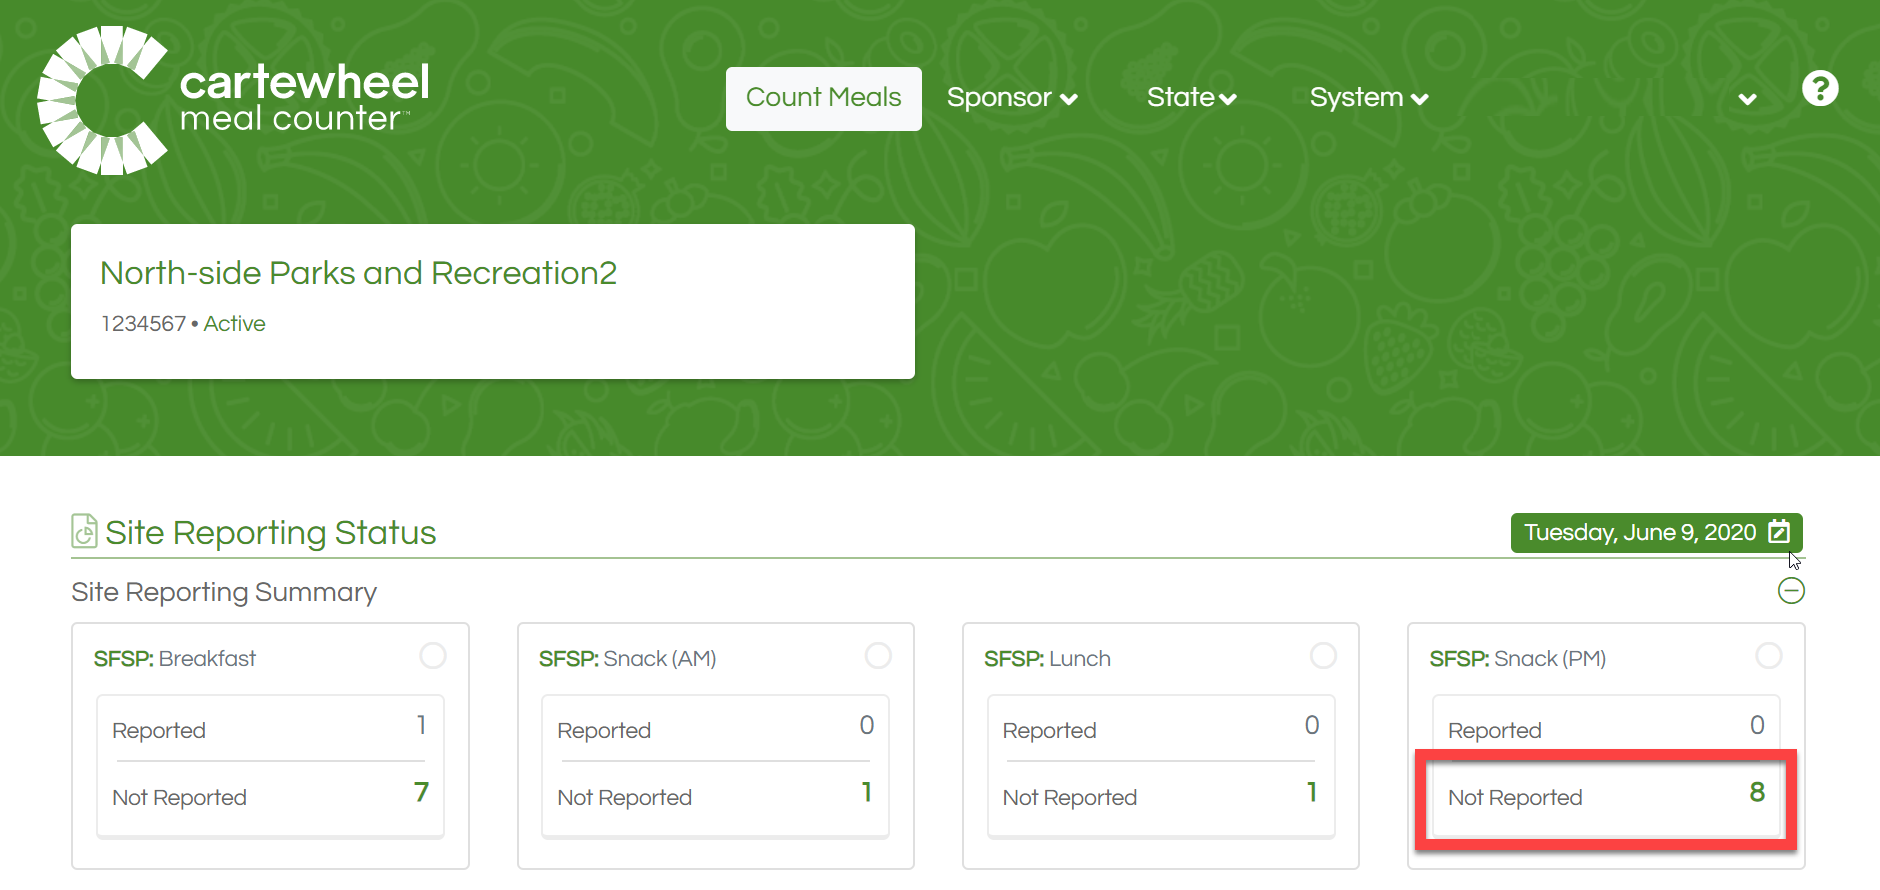
As Meal Counts progress, they are shown on the dashboard and in other places with unique iconography to signify their current status. See the Icon Legend for greater detail.
Add or Review Meal Counts
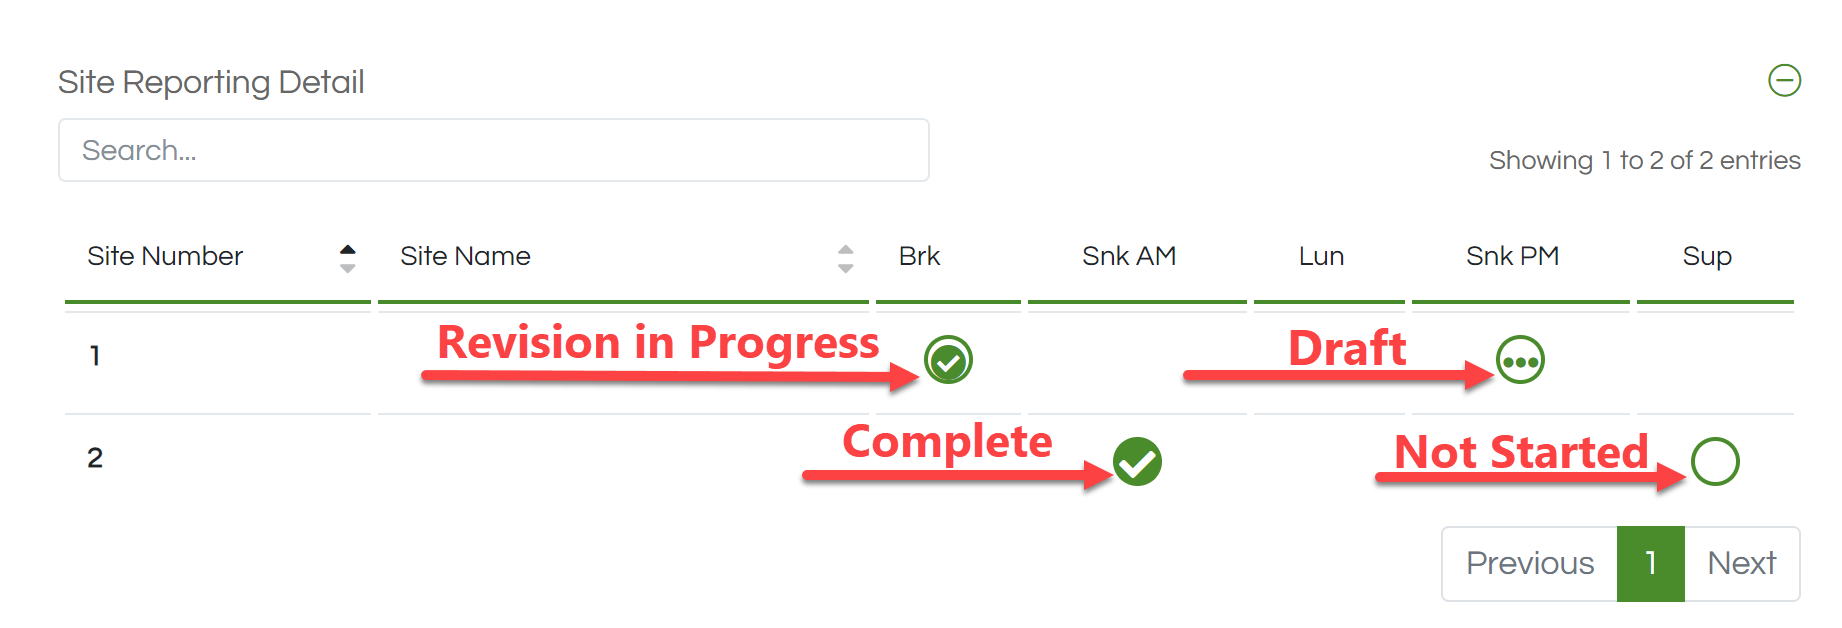
Click on a hollow circle in the ‘Site Reporting Detail’ section to add a new meal count or select a filled-in circle to view a draft or complete meal count.
Review Meal Counts
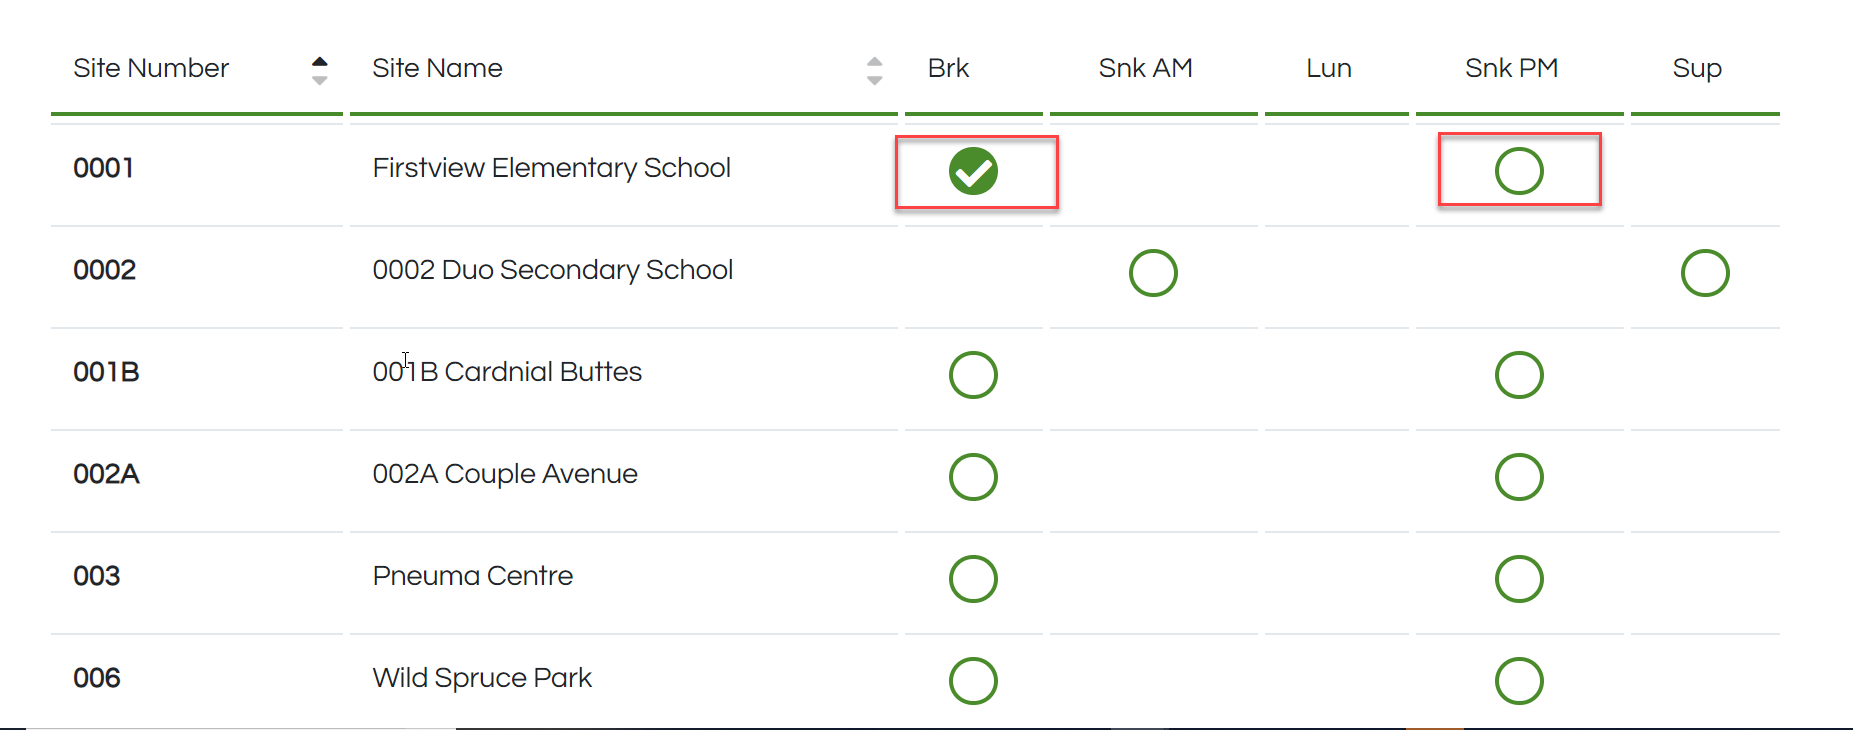
After clicking on a meal from the Sponsor Dashboard, a page is loaded that lists all meal count submissions. They are shown historically versioned, each with a corresponding electronic SFSP form.
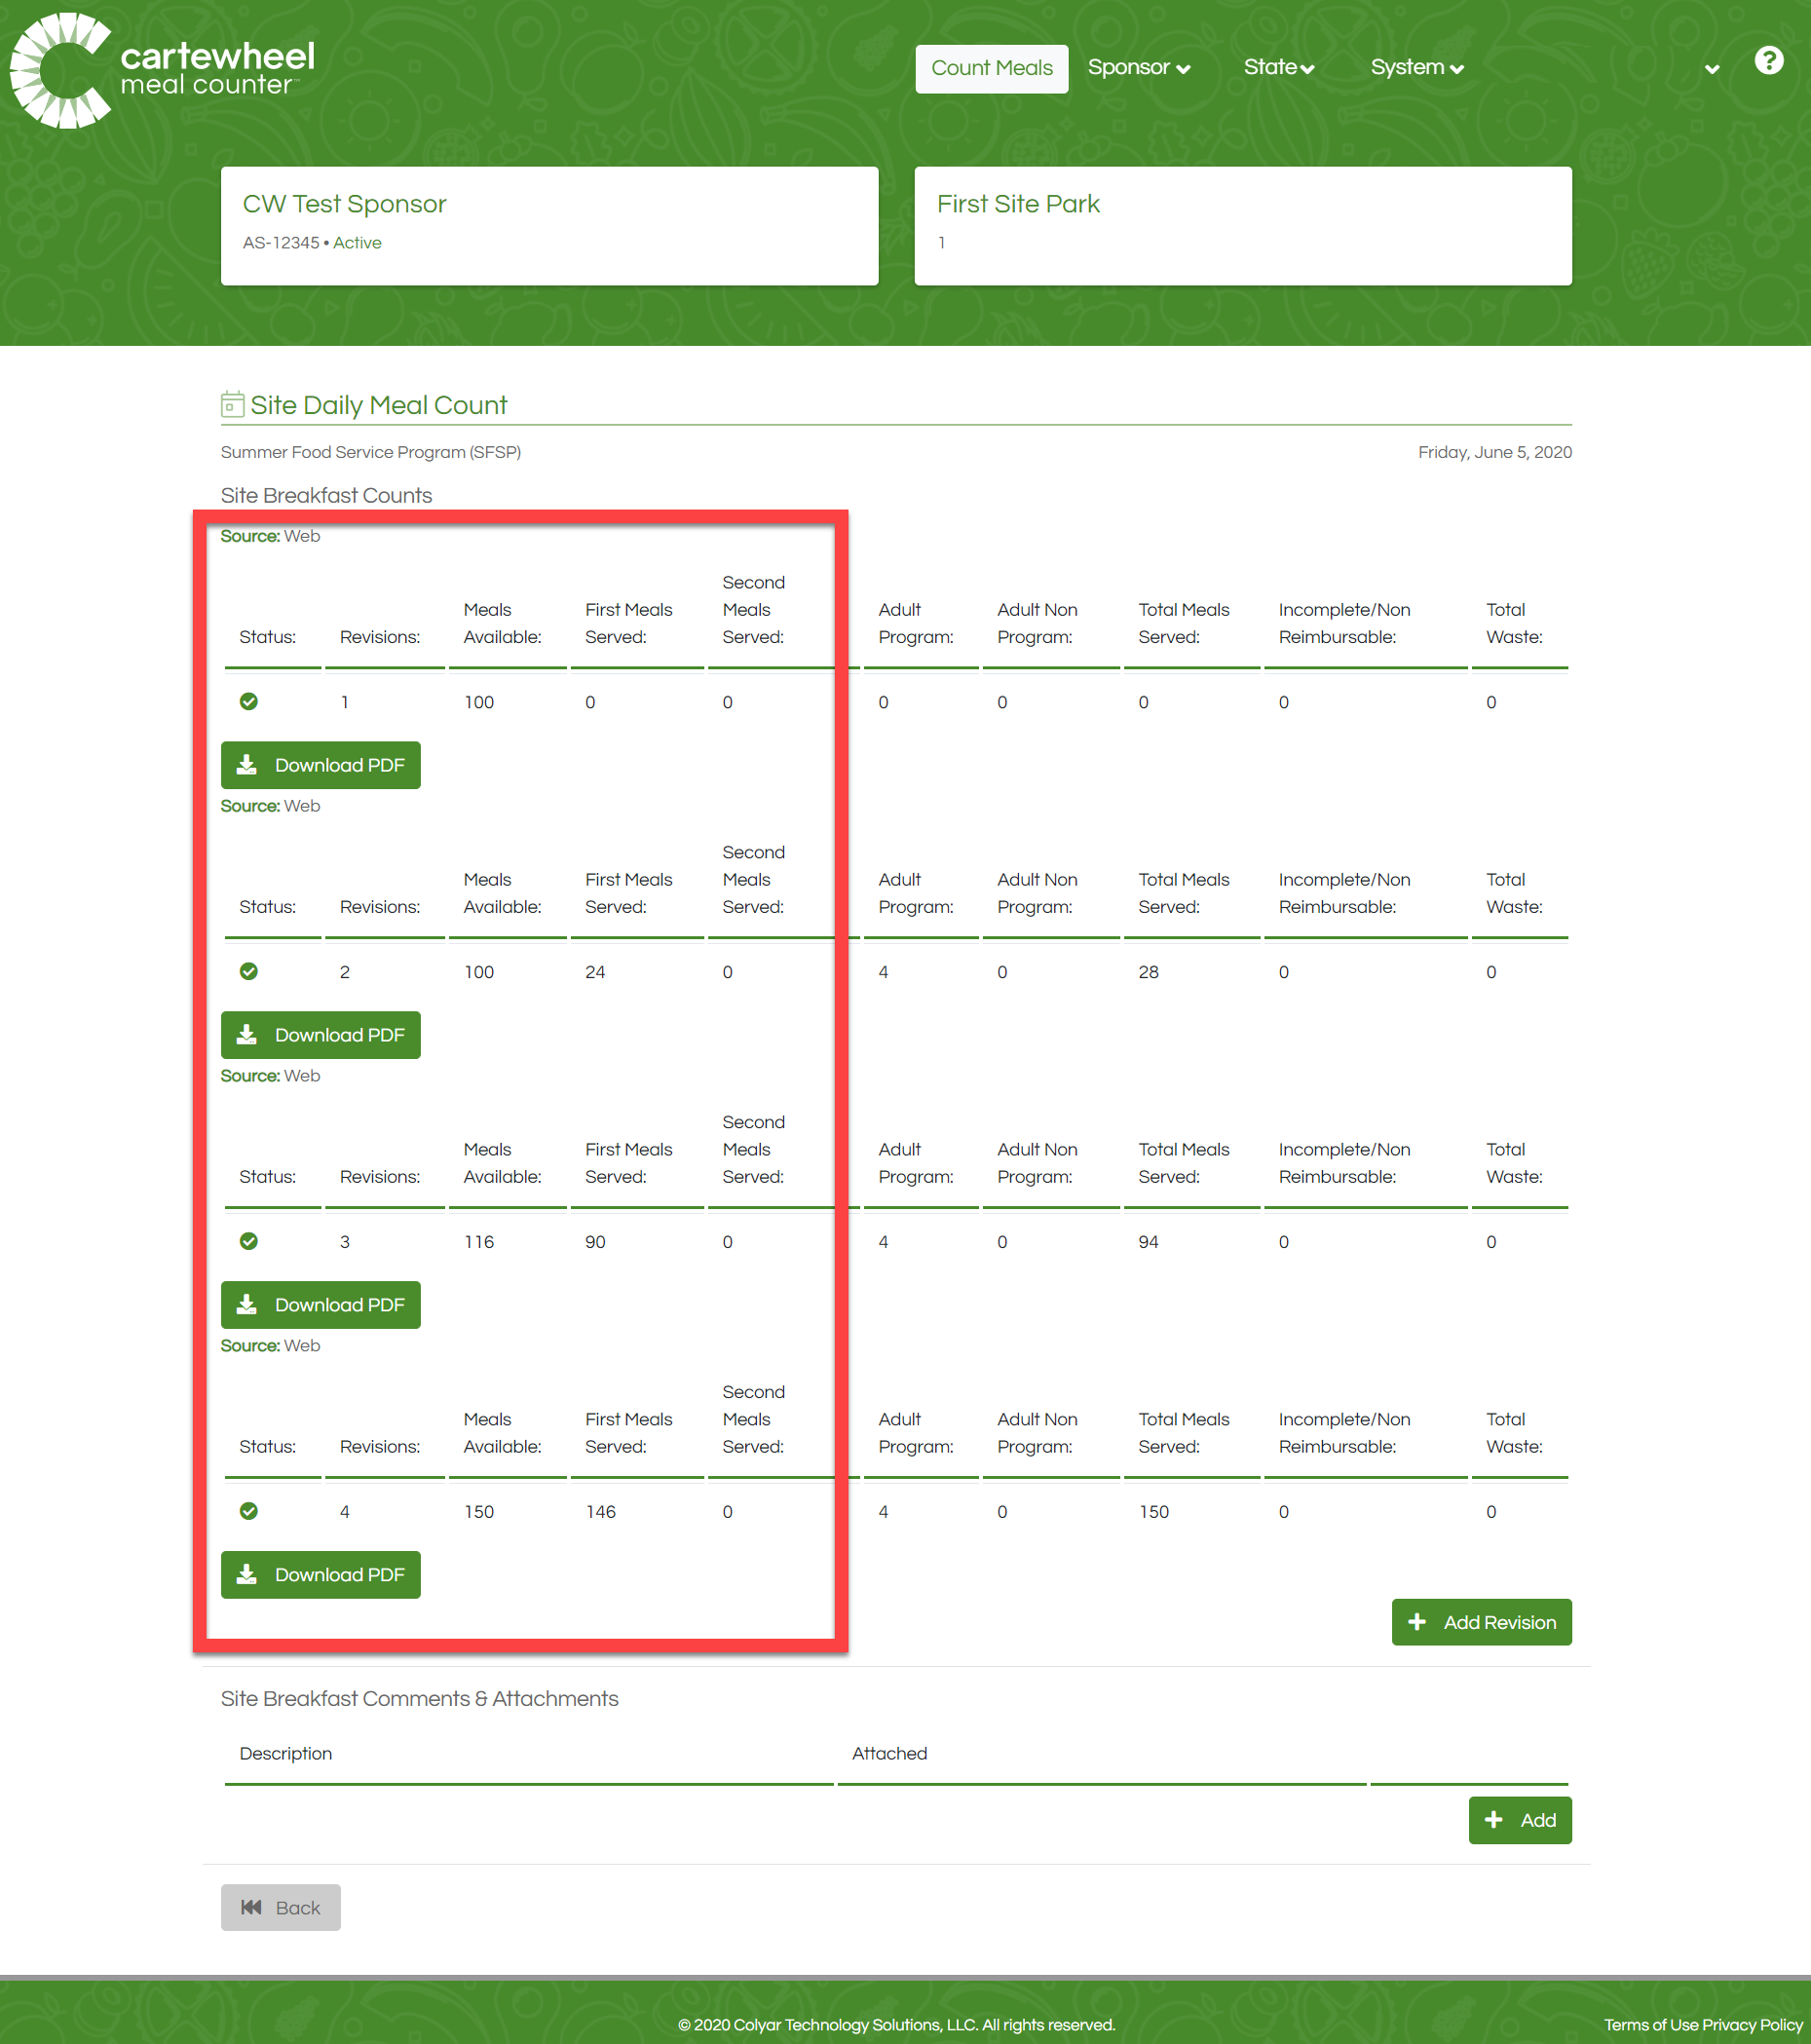
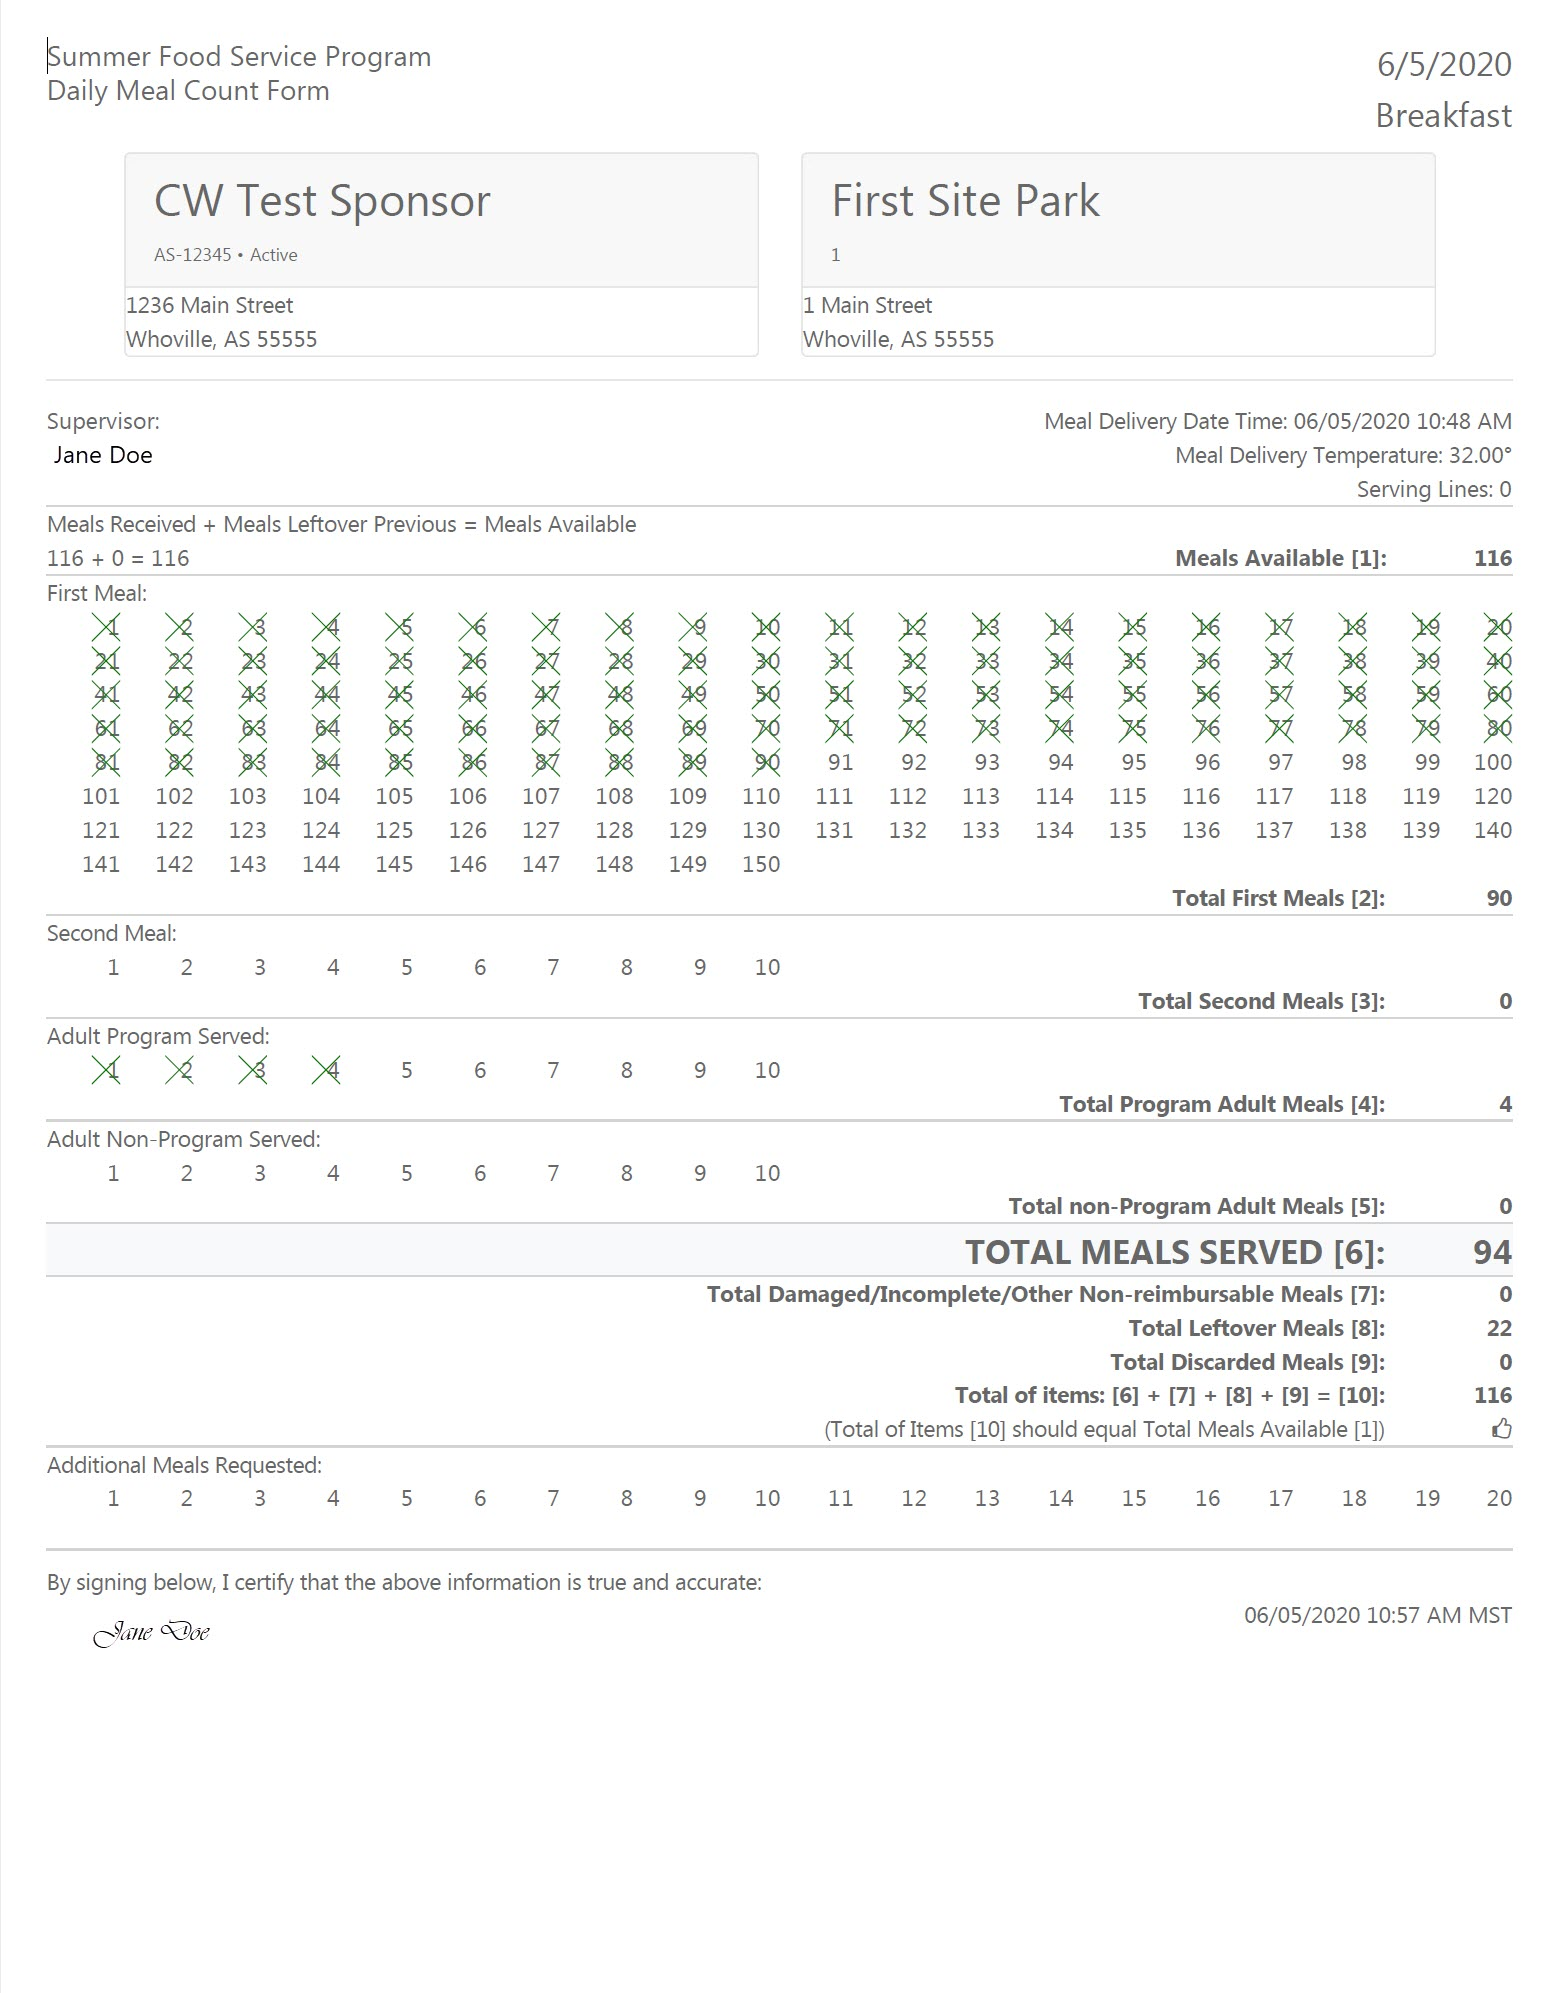
Meal Count PDFs are clearly marked off with an 'X' and the authenticated e-signature is date and time stamped to support program integrity. All fields are electronically generated for accuracy.
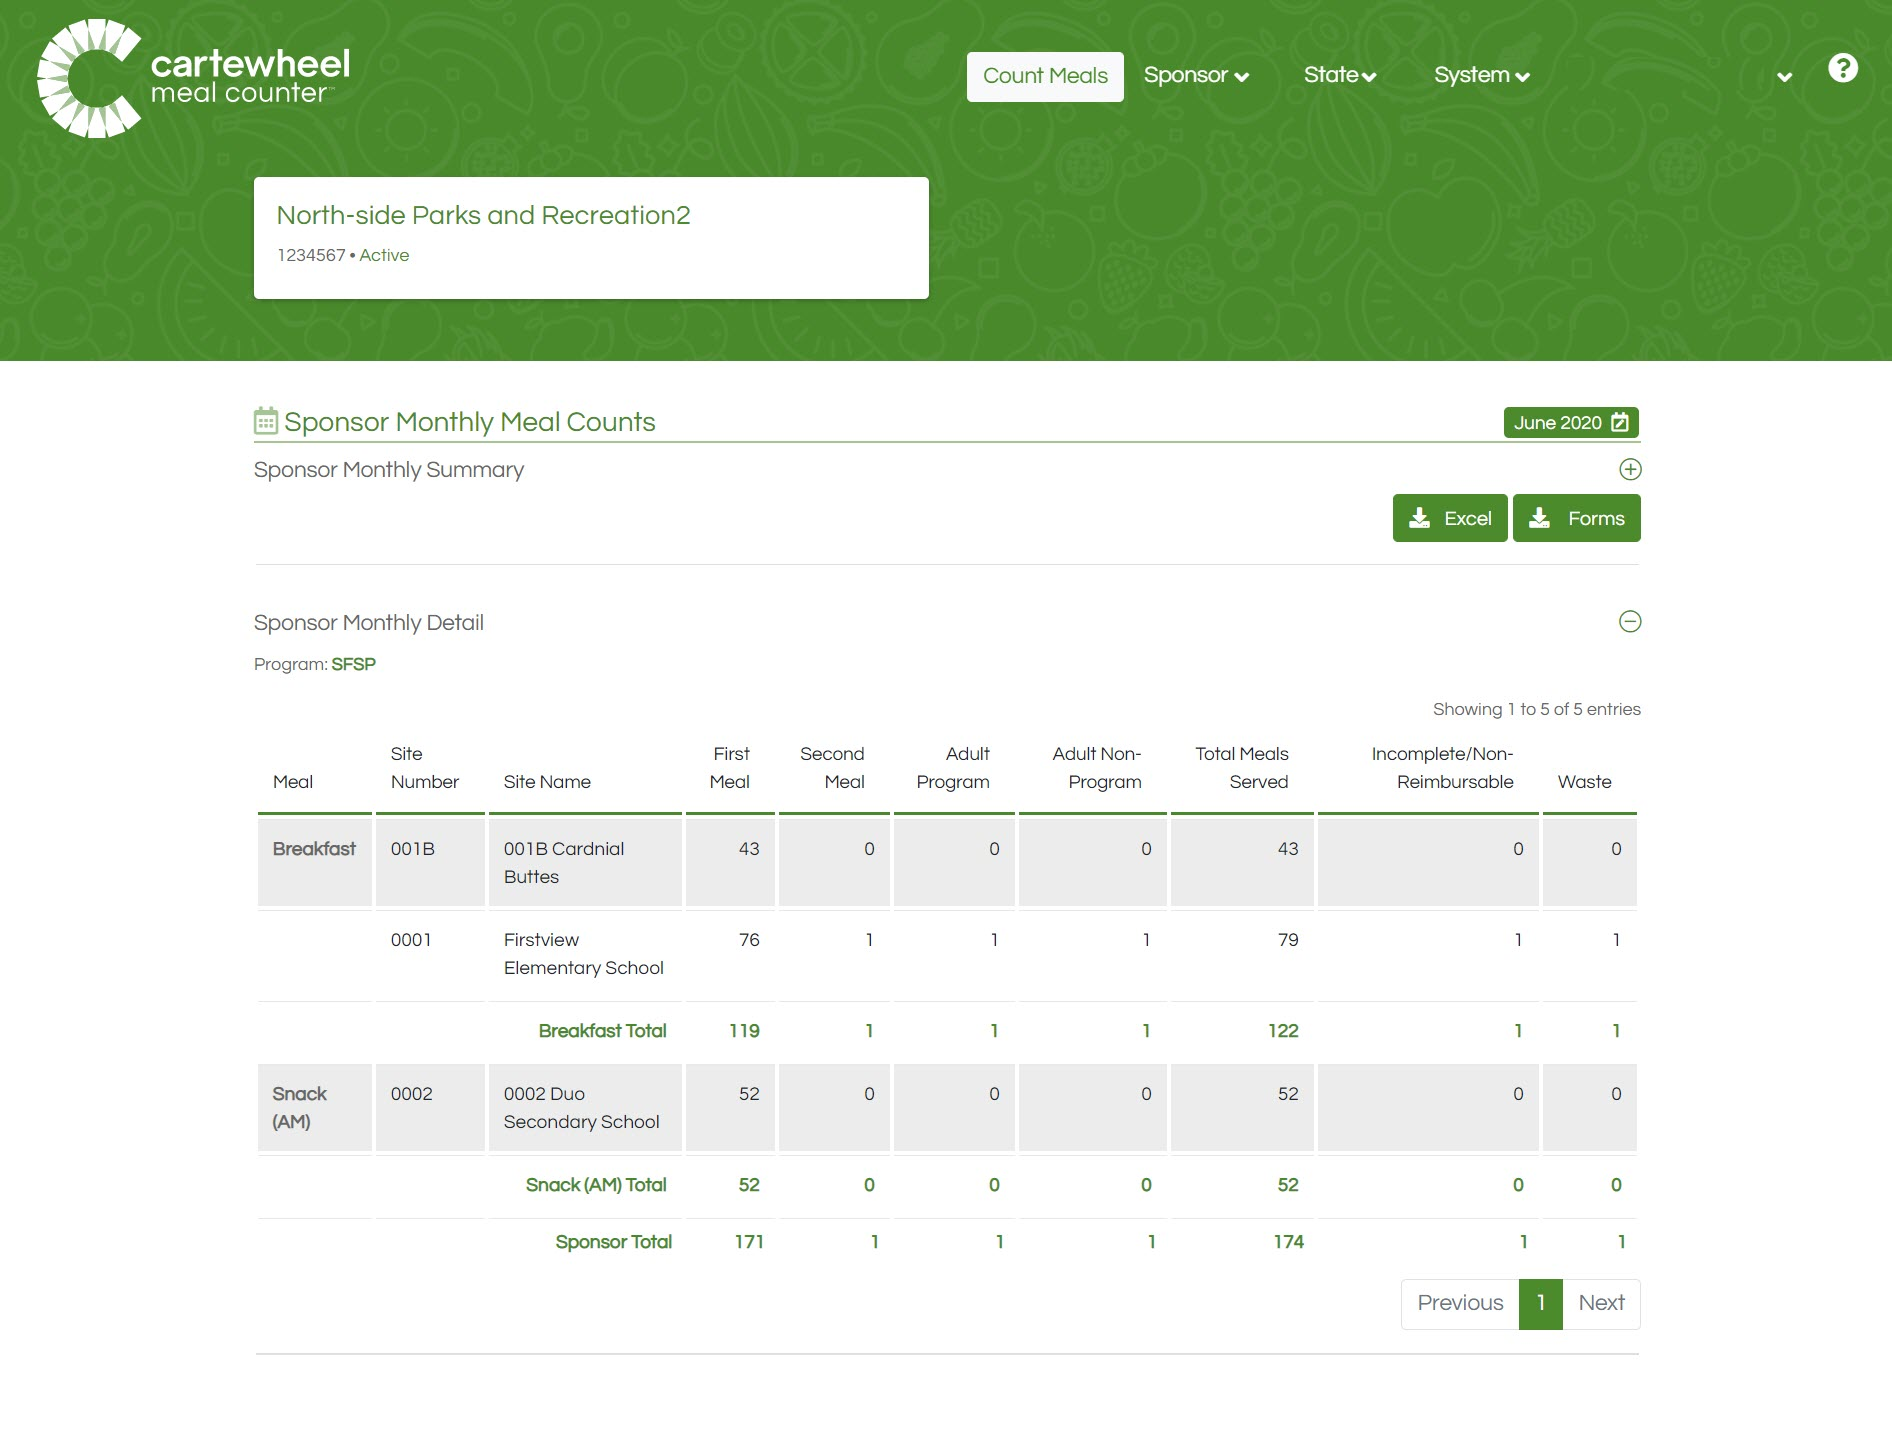
Meal Count Reports
View daily, monthly, and custom meal count reports by clicking the link in the 'Sponsor' dropdown menu which is located at the upper right corner of the screen.

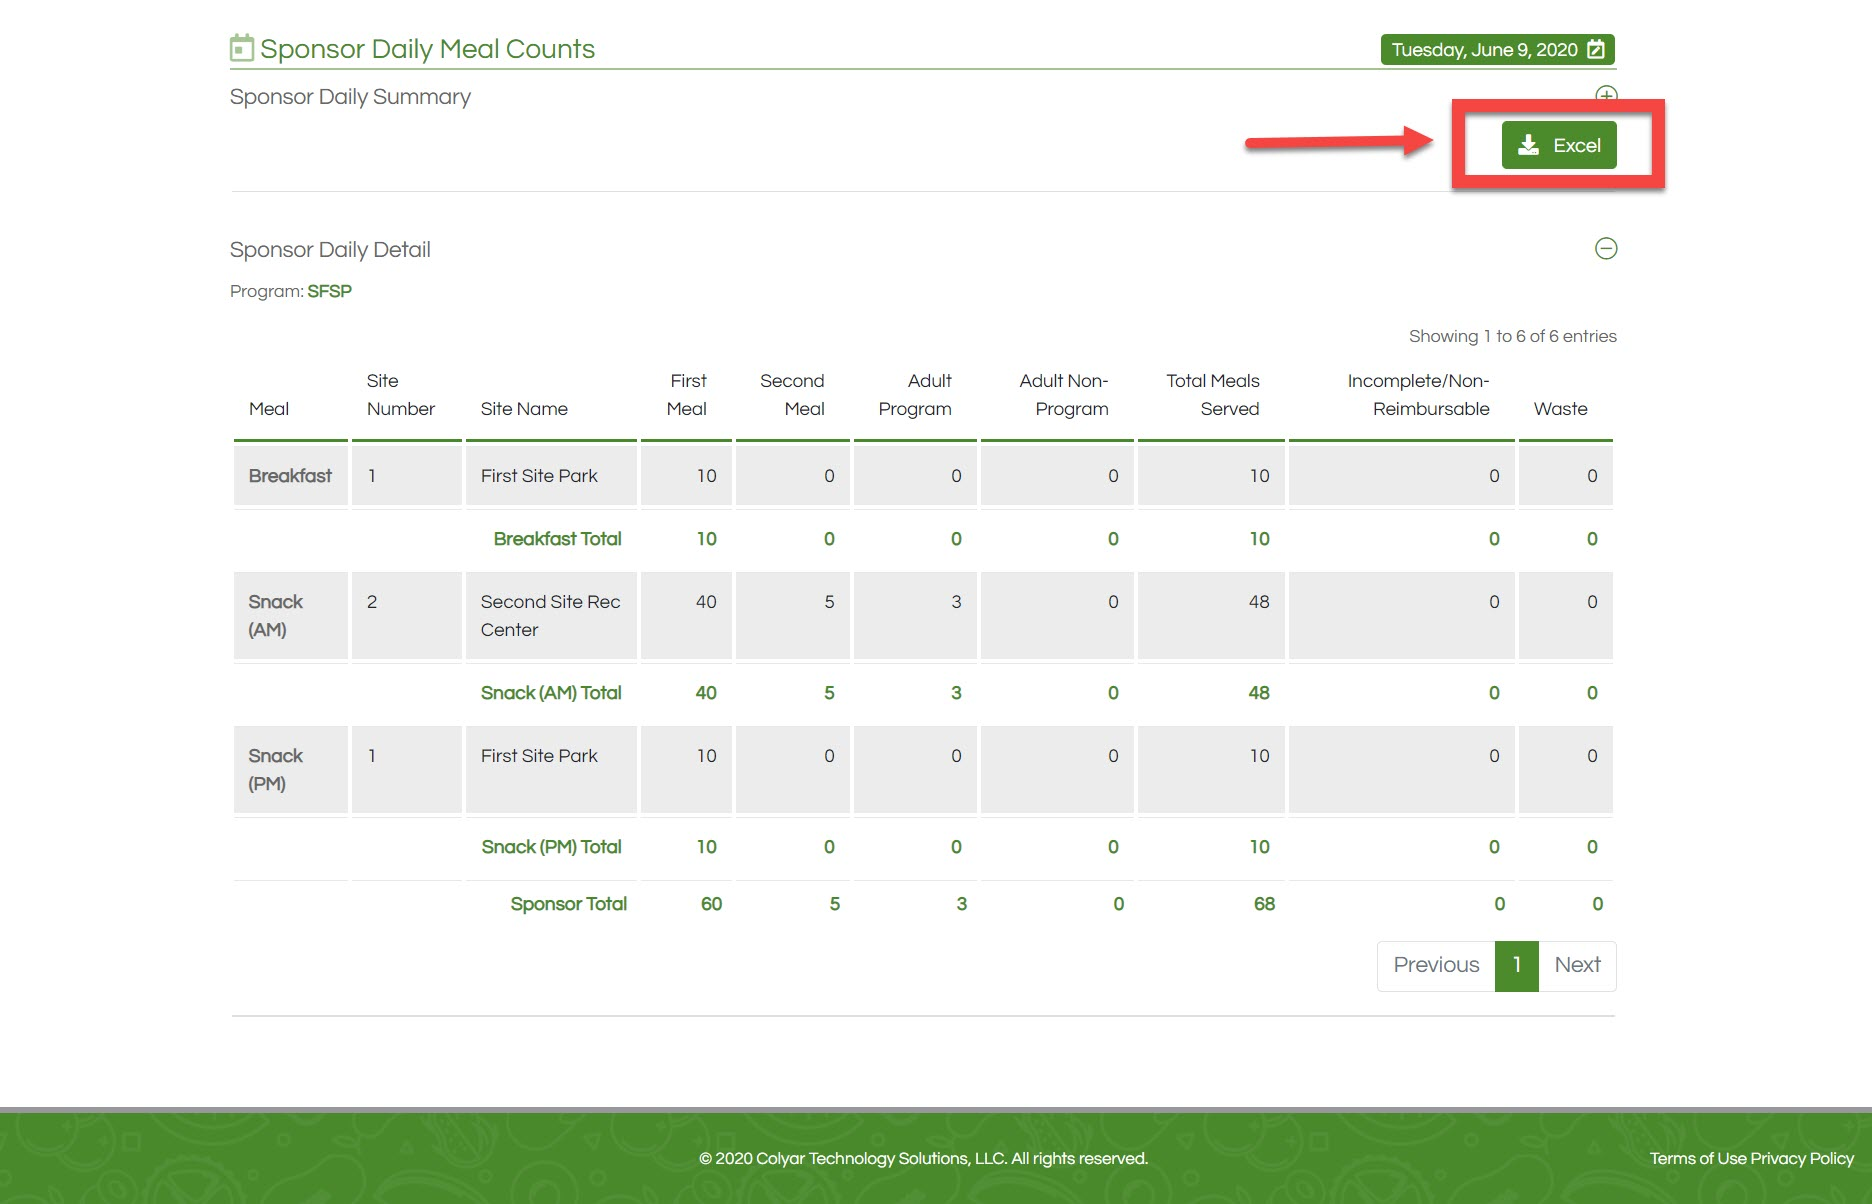
Excel Export
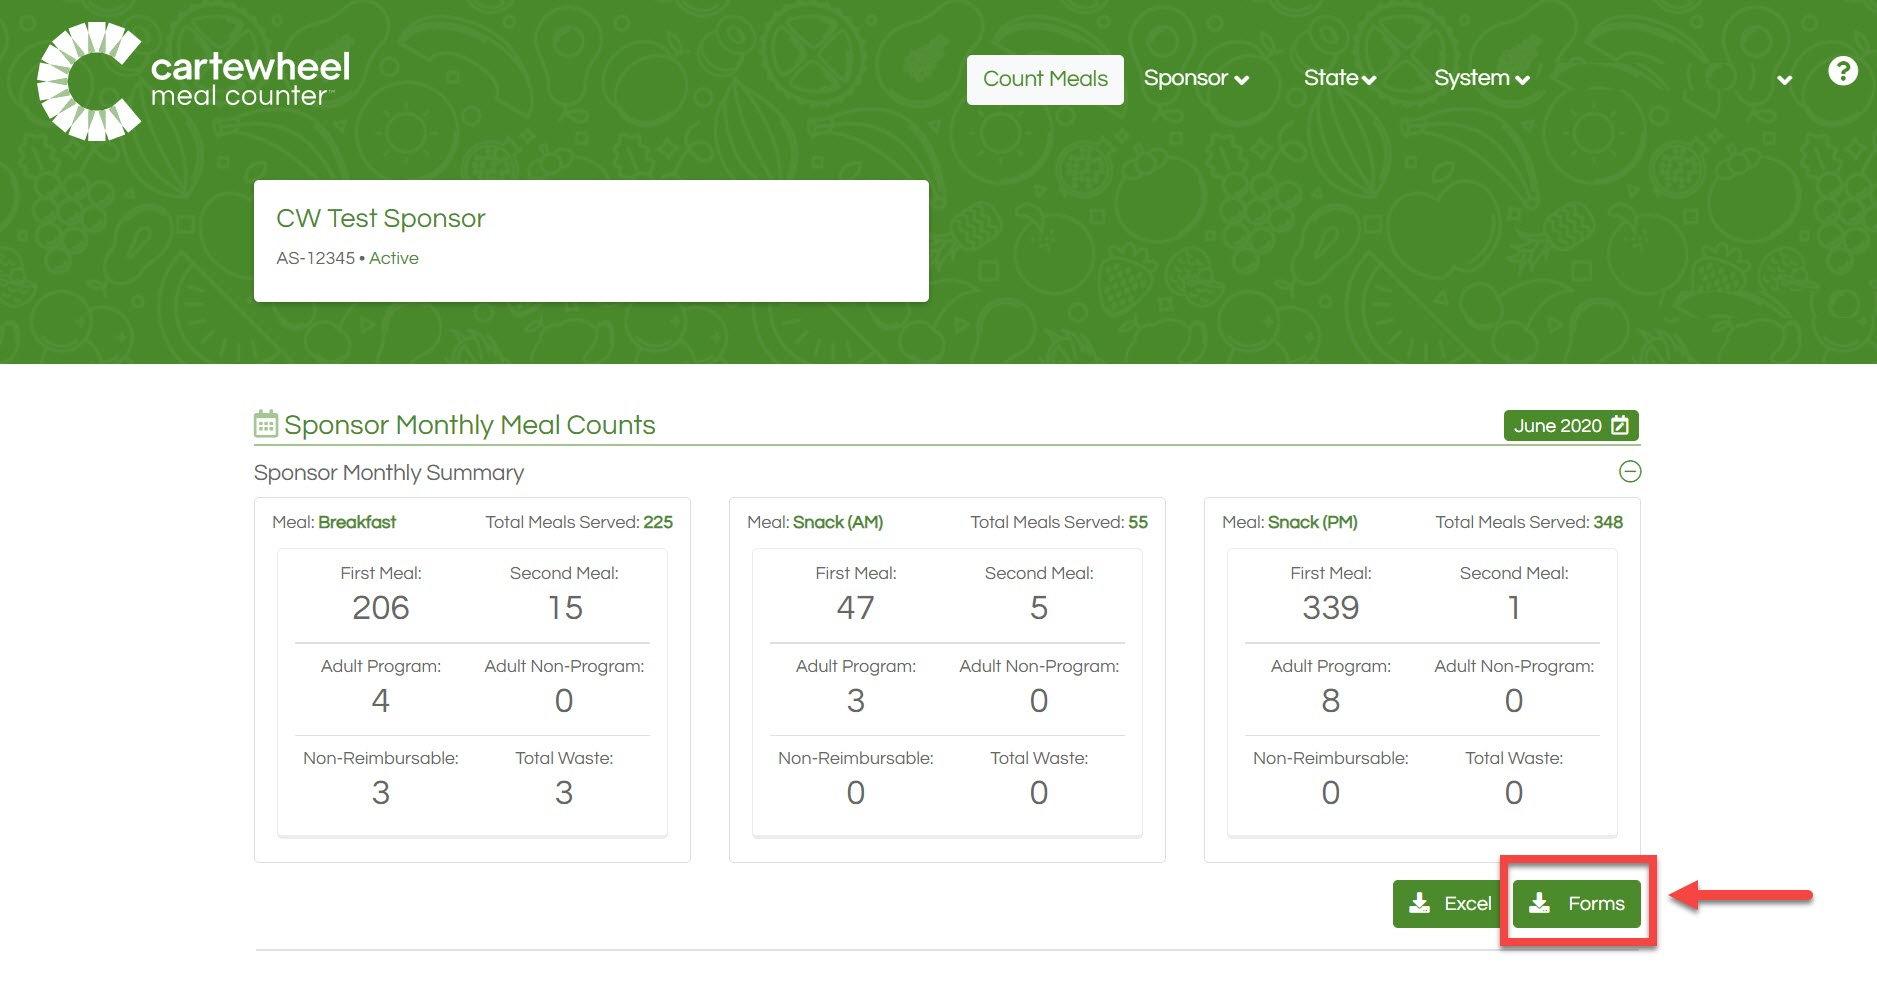
All reports can be exported by clicking the 'Excel' button (report example below).

Bulk SFSP Form Archive
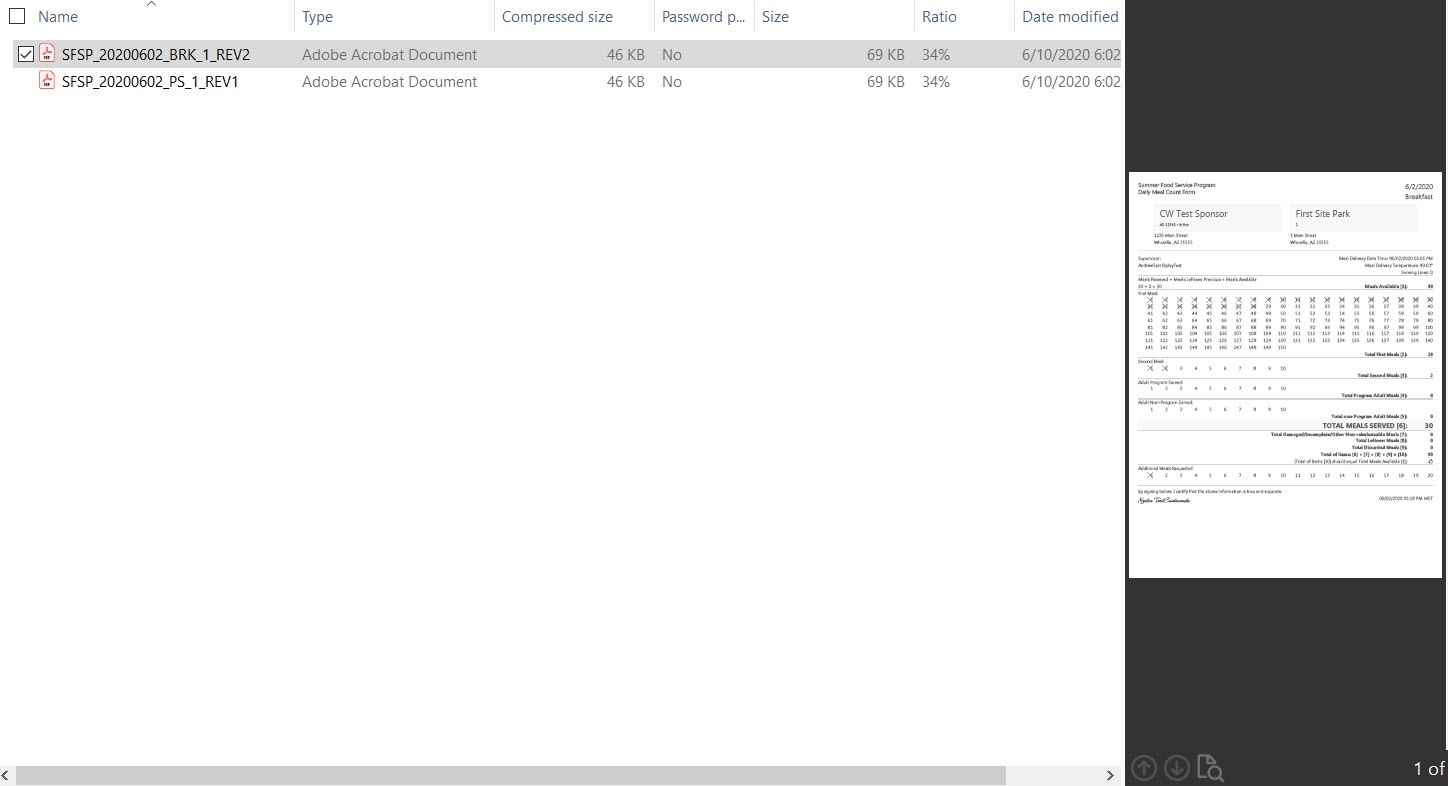
On the Monthly or Custom Meal Count report, select the 'Forms' button to download a batch file with every electronic SFSP form for the Month or configured timeframe.
Sponsor Management
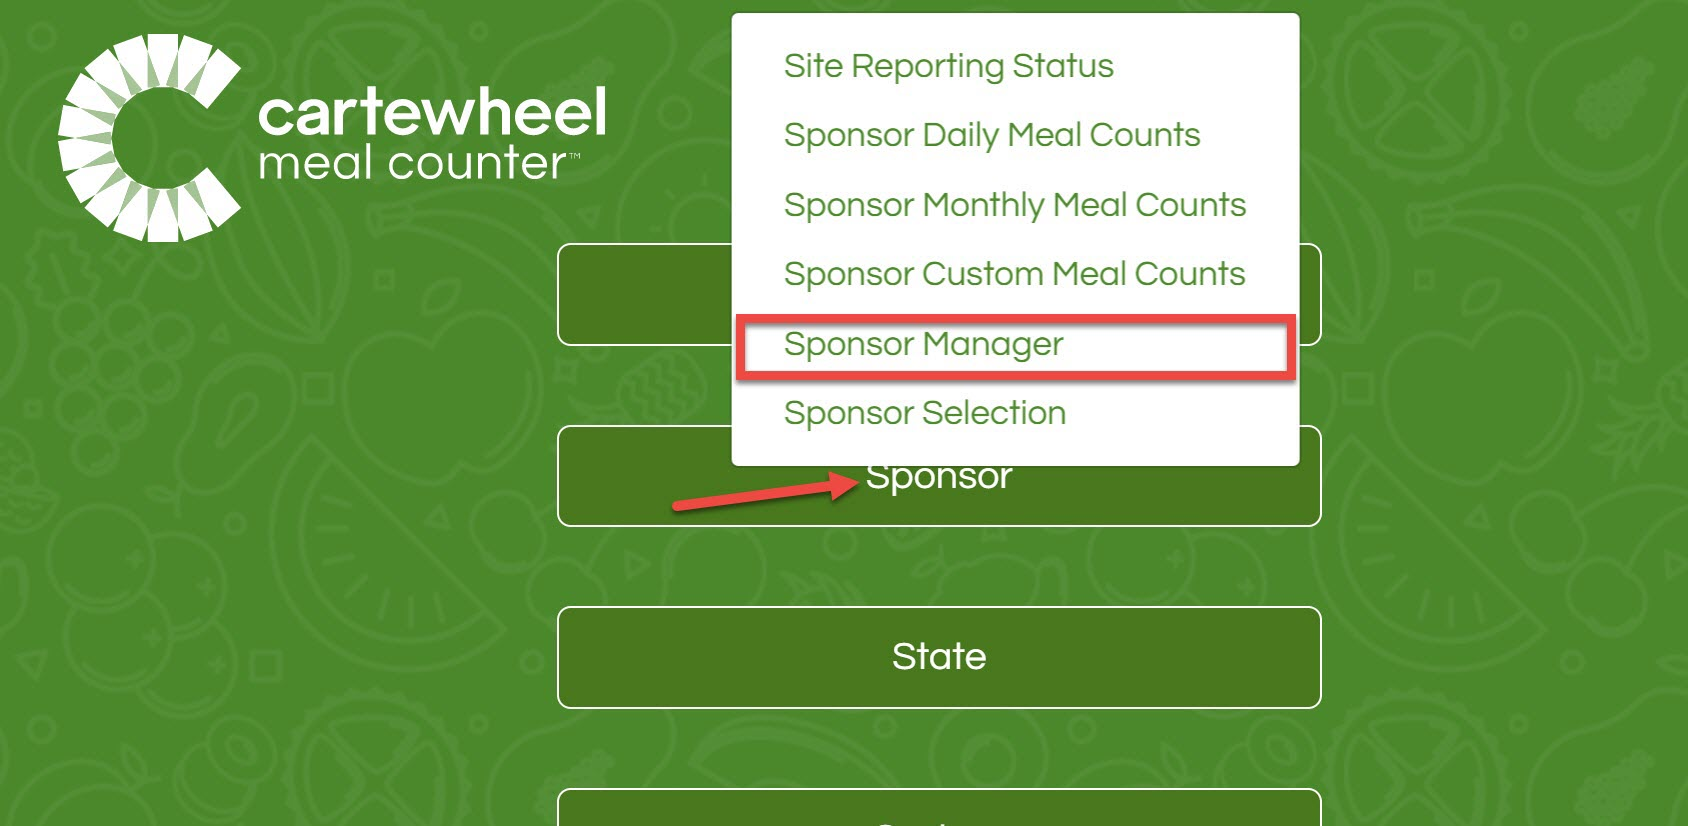
Select ‘Sponsor Manager’ from the 'Sponsor' dropdown menu to access setup and administrative functions.
Sites Section
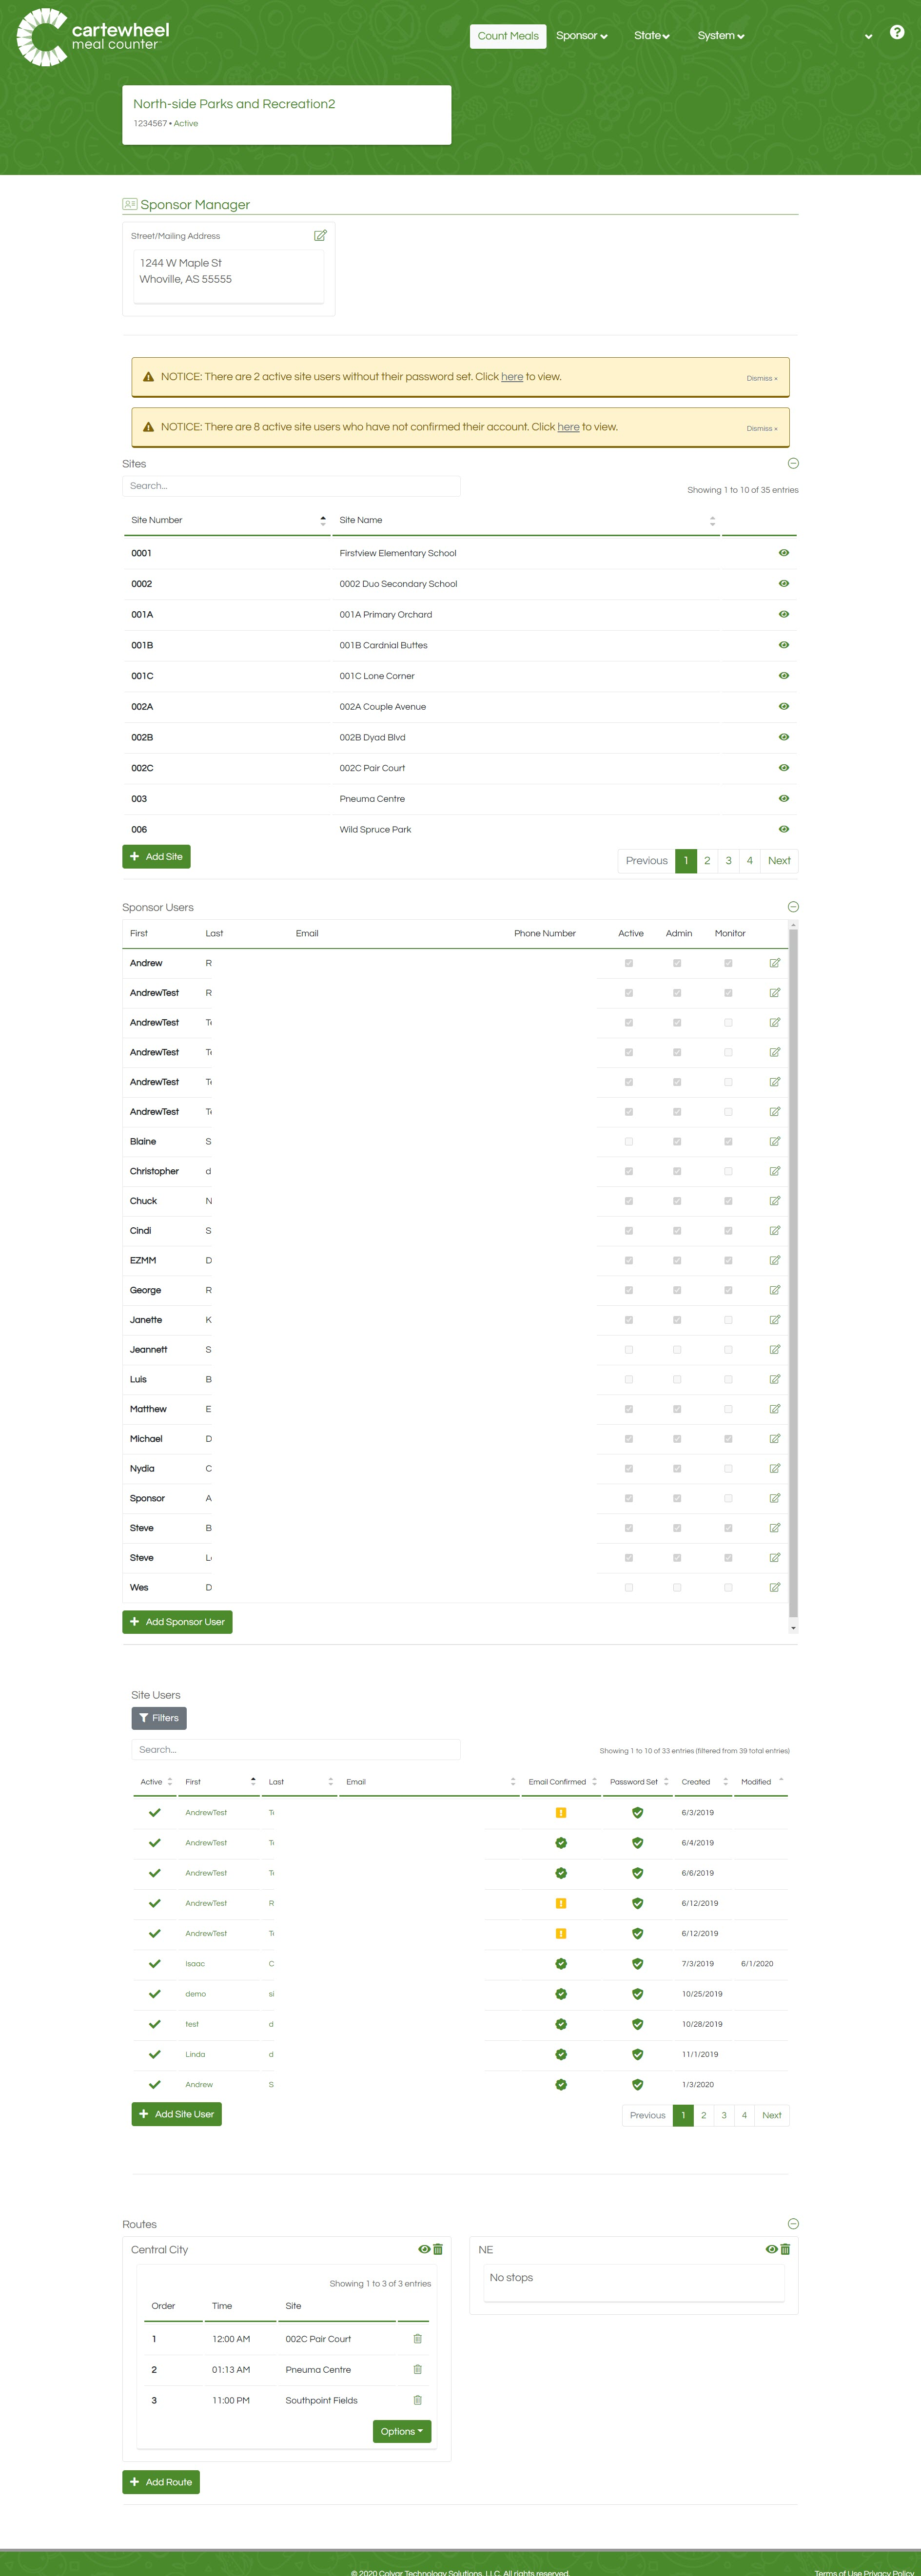
Click  icon next to a site name to view site details like assigned site users and applications.
Sponsor Users Section
You can view and edit sponsor users here. See Meal Counter User Roles & Permissions for details.

Site Users Section
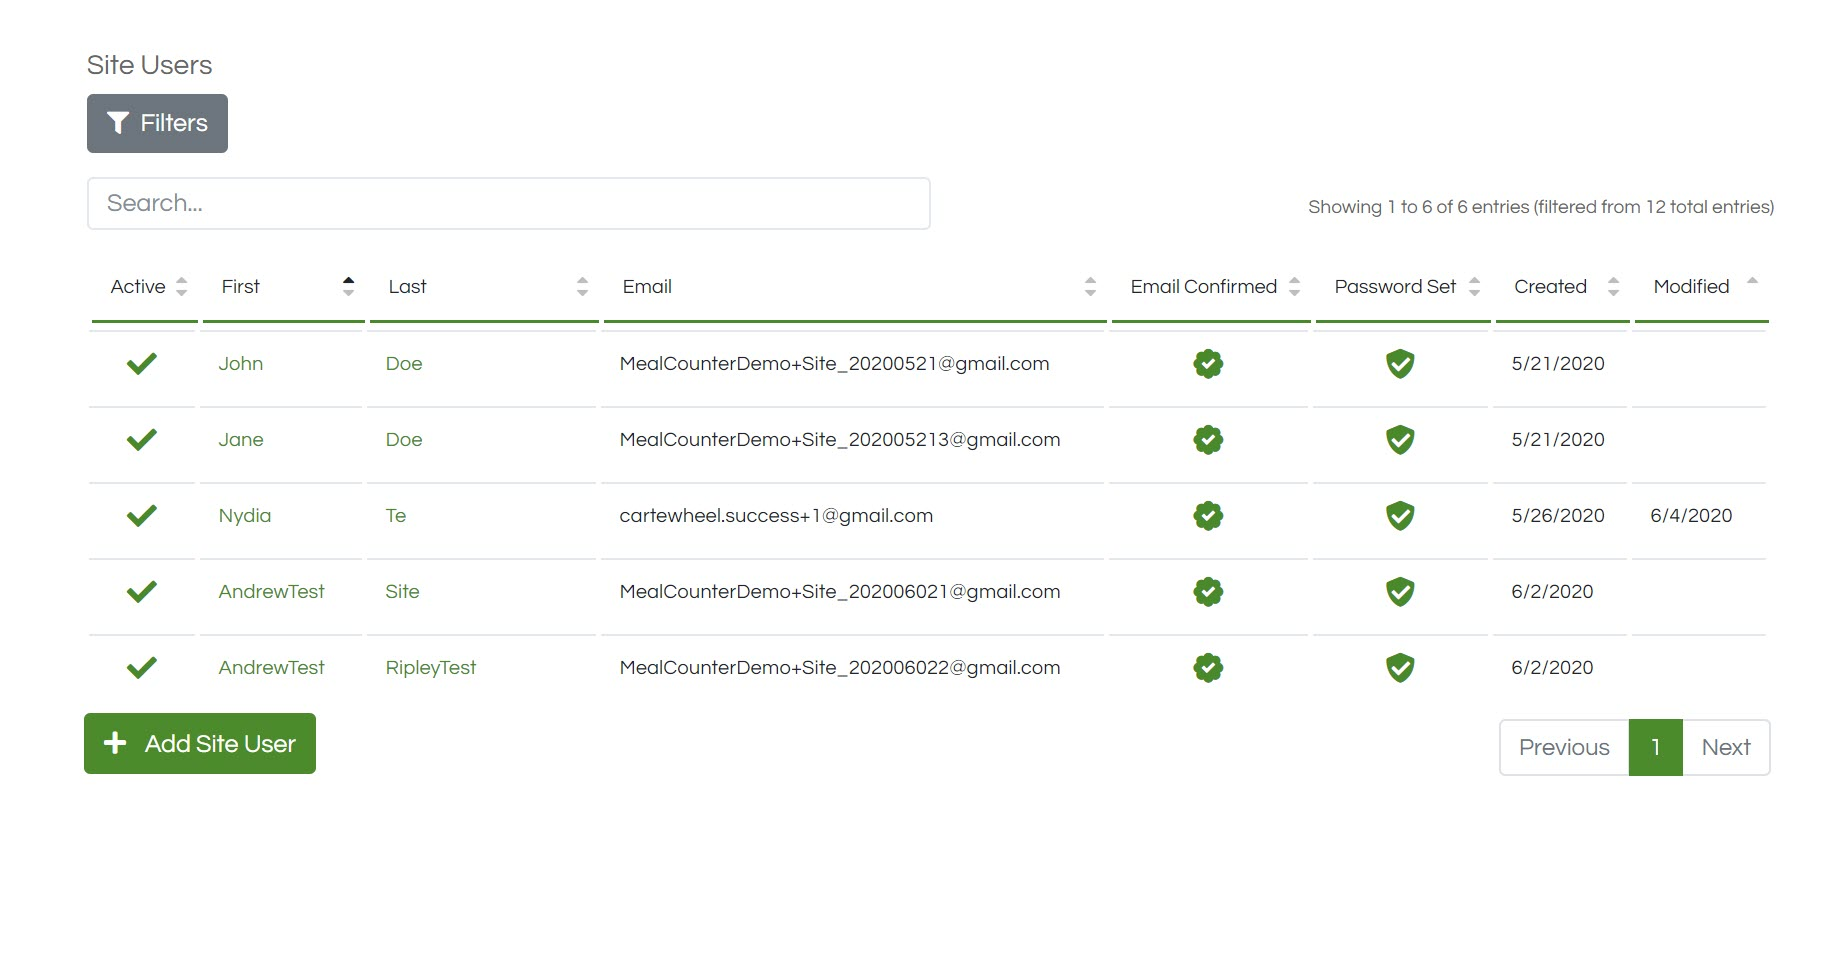
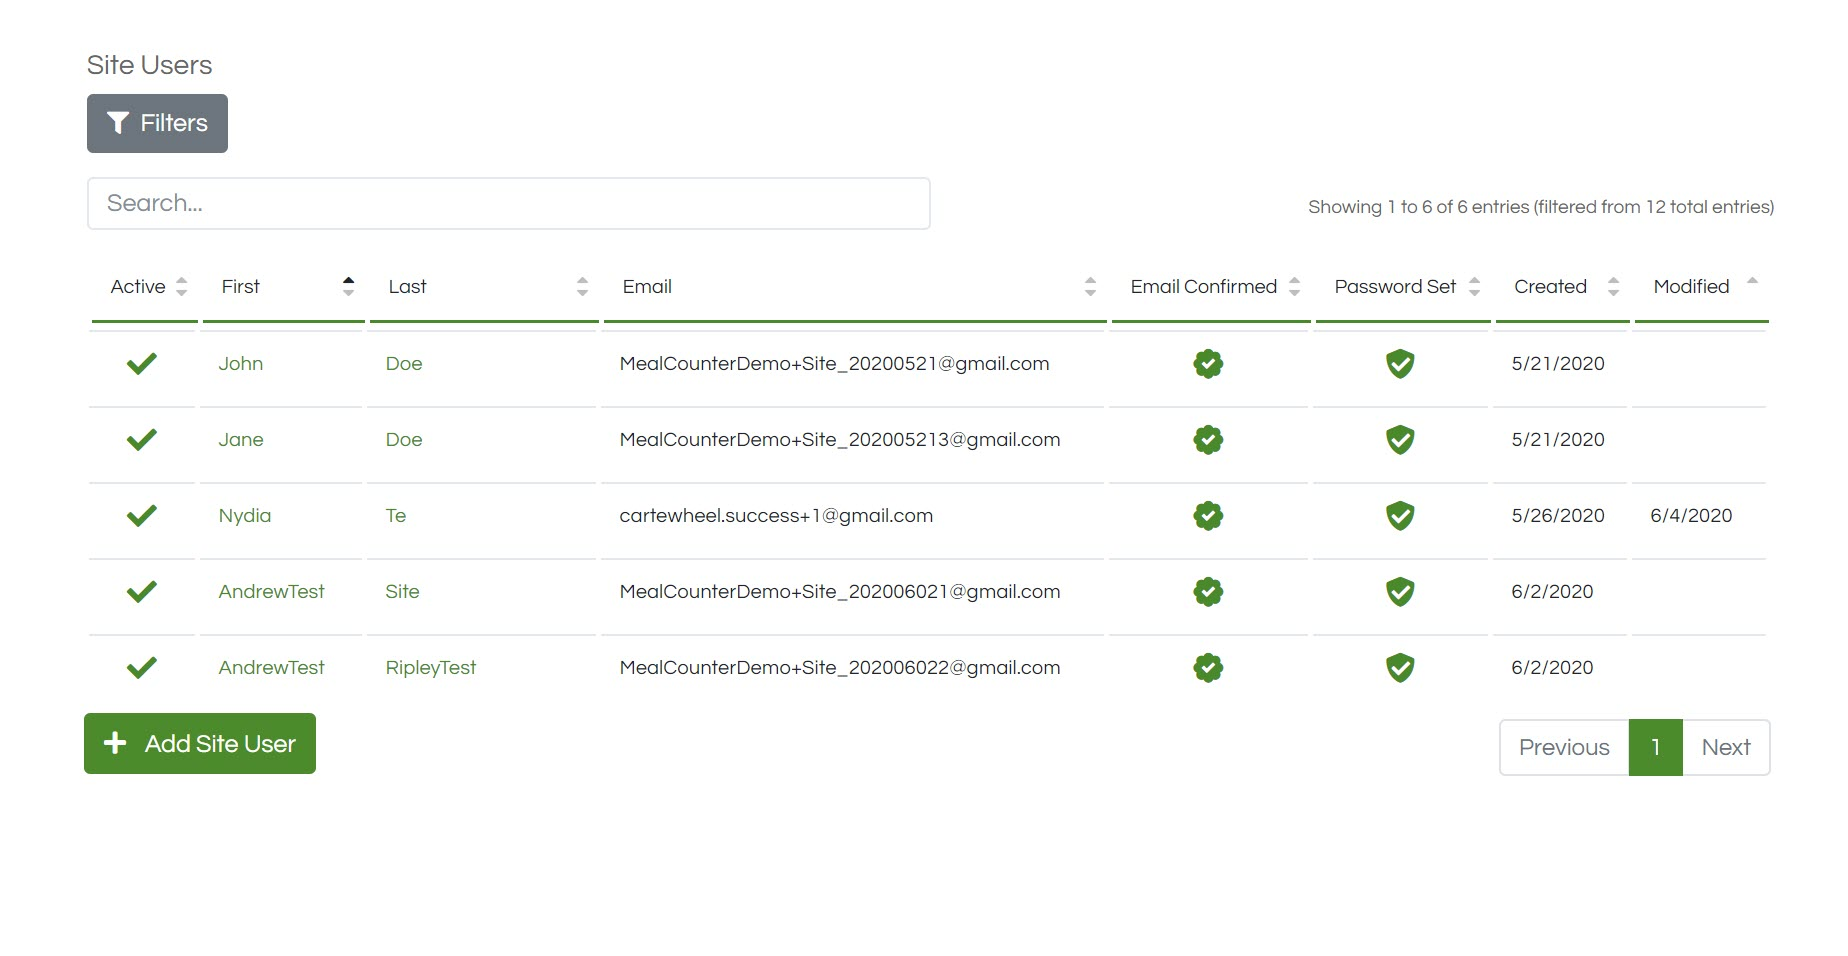
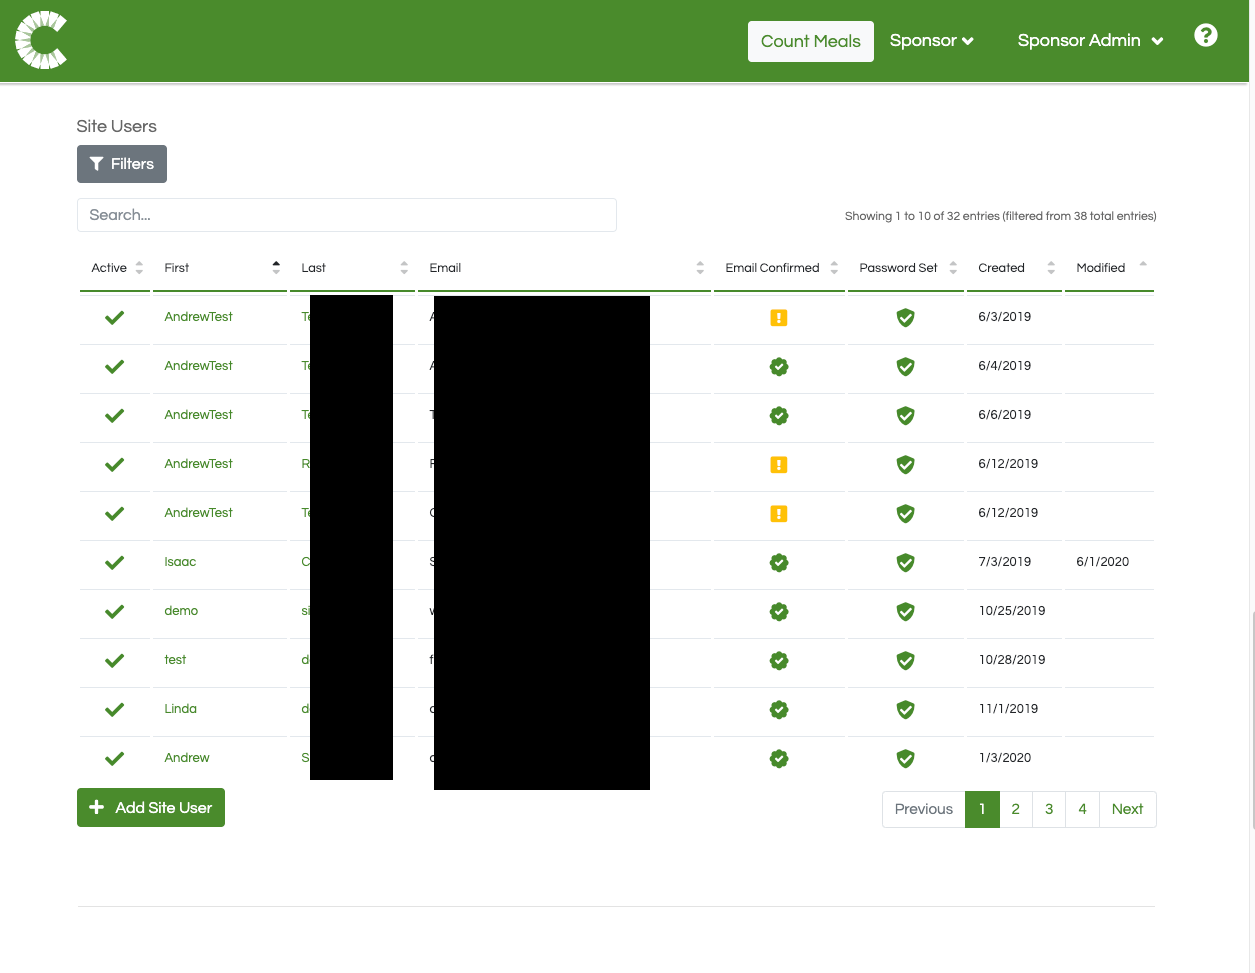
In the 'Site Users' section, you can quickly find, view, and edit users assigned to serving sites.
Routes Section
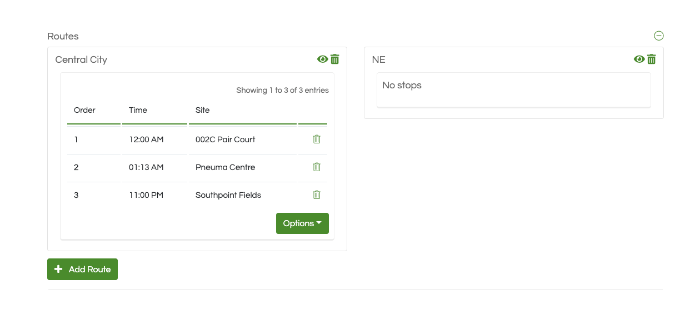
The routes section provides sponsors with a way to link sites along a mobile meal route.
Meal Counter Setup
Meal Counter can be set up in three easy Steps:
-
Sponsor Details
-
Site Details & Applications
-
Sponsor & Site Users.
Setup Steps 1 & 2 - Sponsor & Sites
Completing steps 1 and 2 differs depending on if your sponsor organization is using Meal Counter as part of a State Agency provided program or not.
For those using Meal Counter as part of a State Agency program, follow the guide in the list below that matches your state for detailed instructions:
Setup Step 3 - Adding and Editing Users
Adding and editing users is easy with Meal Counter. To learn more about the permissions associated with different types of users, see the Meal Counter User Roles & Permissions knowledge base article.
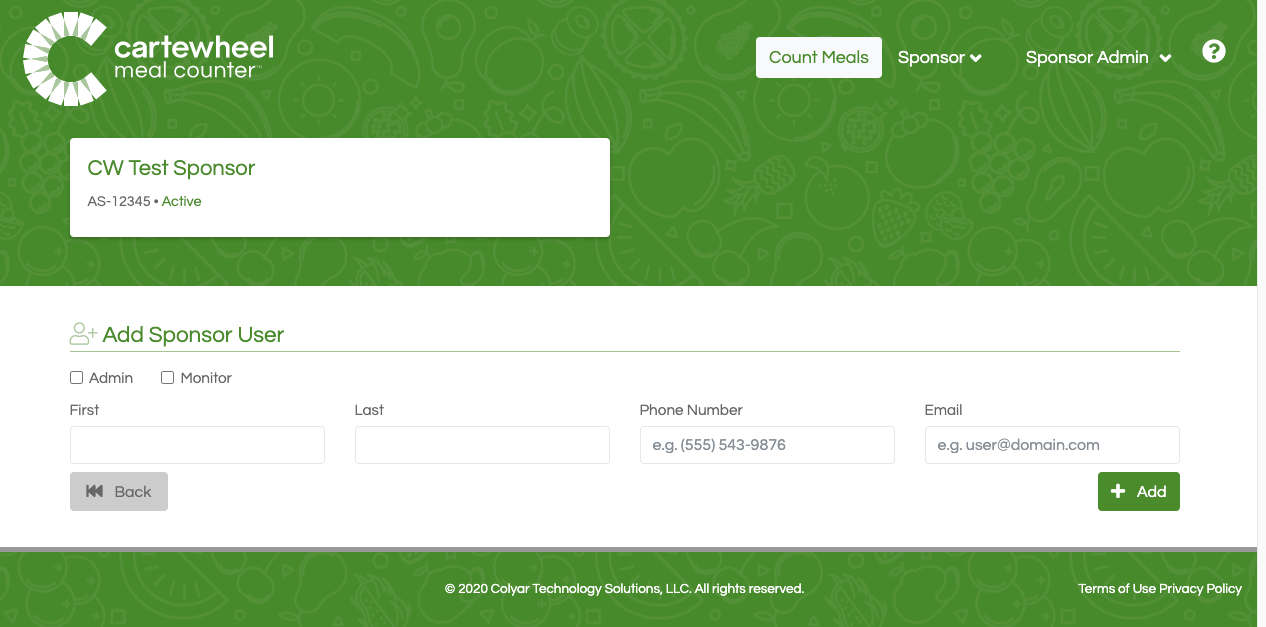
Sponsor Users
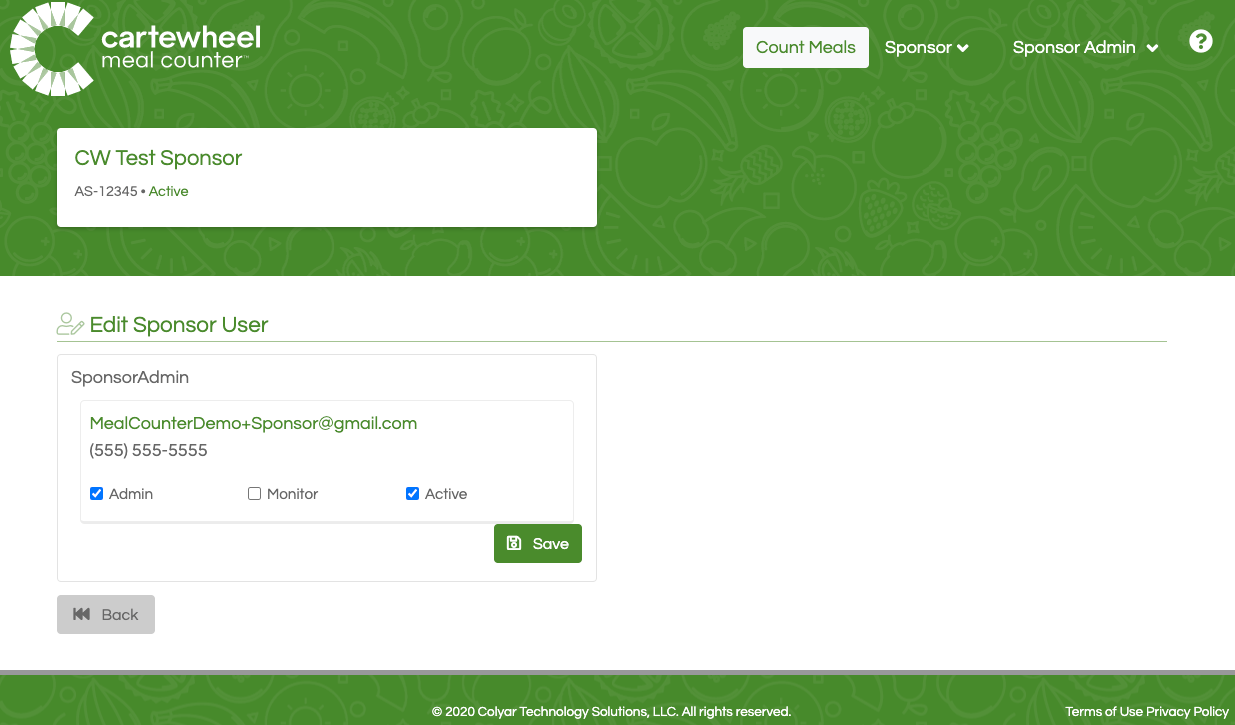
Existing Sponsor Users can be found listed in the 'Sponsor User' section of the Sponsor Manager page.
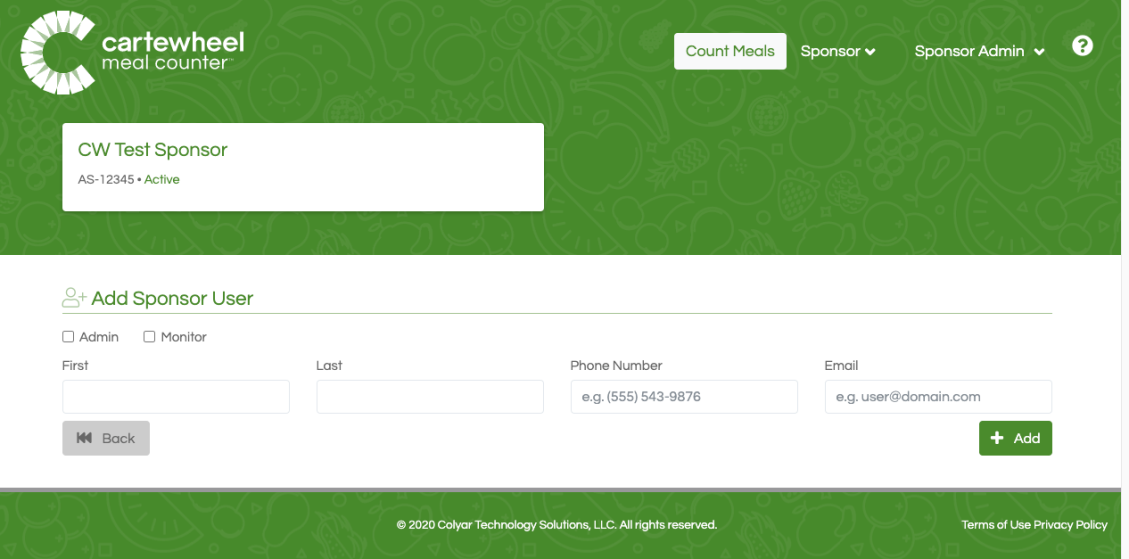
Click 'Add Sponsor User' button at the bottom of the section to add a new user or select the edit button in the corresponding row with the sponsor user's details to change the status or permissions for the existing user.
Site Users
Adding, editing, and managing site users can be readily done either through the Site User section of the Sponsor Manager page or from within the context of a Site.
Finding Site Users
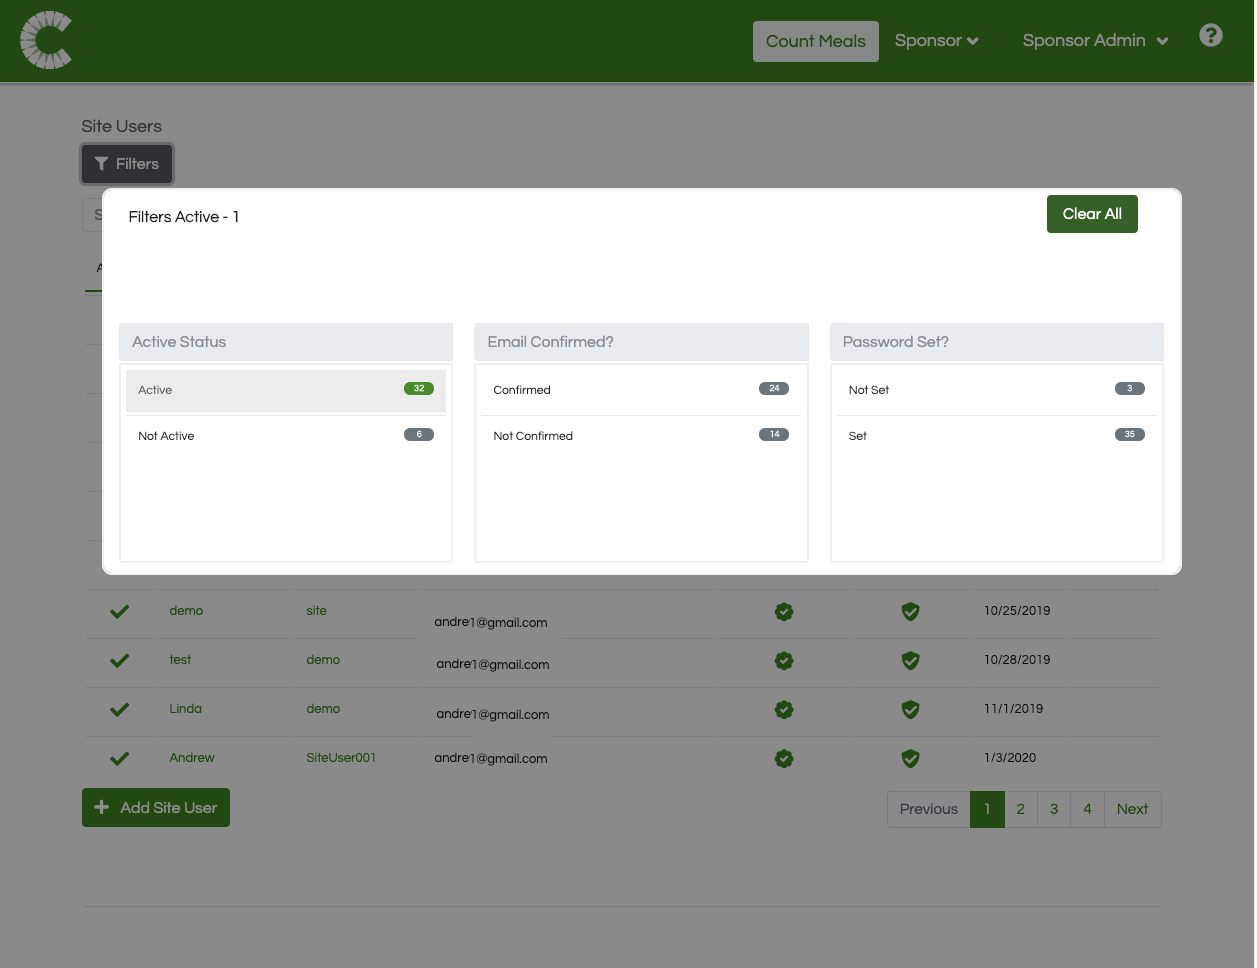
There are four tools that can be employed to aide help find individual or groups of users.
Search for users by name or email address in the search box.

Find groups of users with the 'Filters' feature. Please note that by default users who are no longer active are pre-filtered so they will not appear in the list until the filter state is changed.
Sorting organizes the list of users by ordering the rows alphabetically or chronologically. For instance, here users are ordered by the date their user record was created:
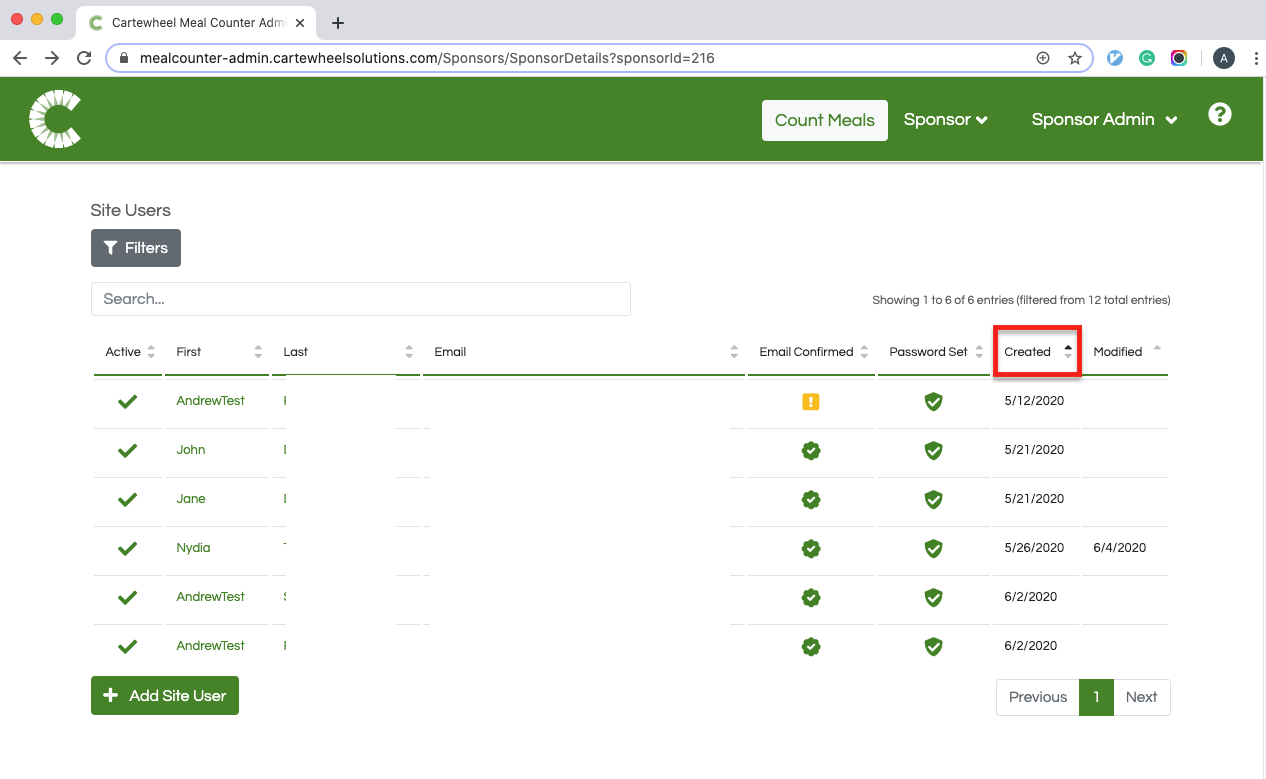
Please note, the 'Email Confirmed' column and 'Password Set' column will help you identify users who may be experiencing account confirmation or account access issues while the 'Active' status signifies if they currently or no longer have access to serve meals.
Lastly, use the 'Previous', 'Next,' or numeric buttons at the bottom of the user list to browse through the users by page.

Searching, Ordering, Filtering, and Browsing can be combined for greater effect.
Adding Site Users
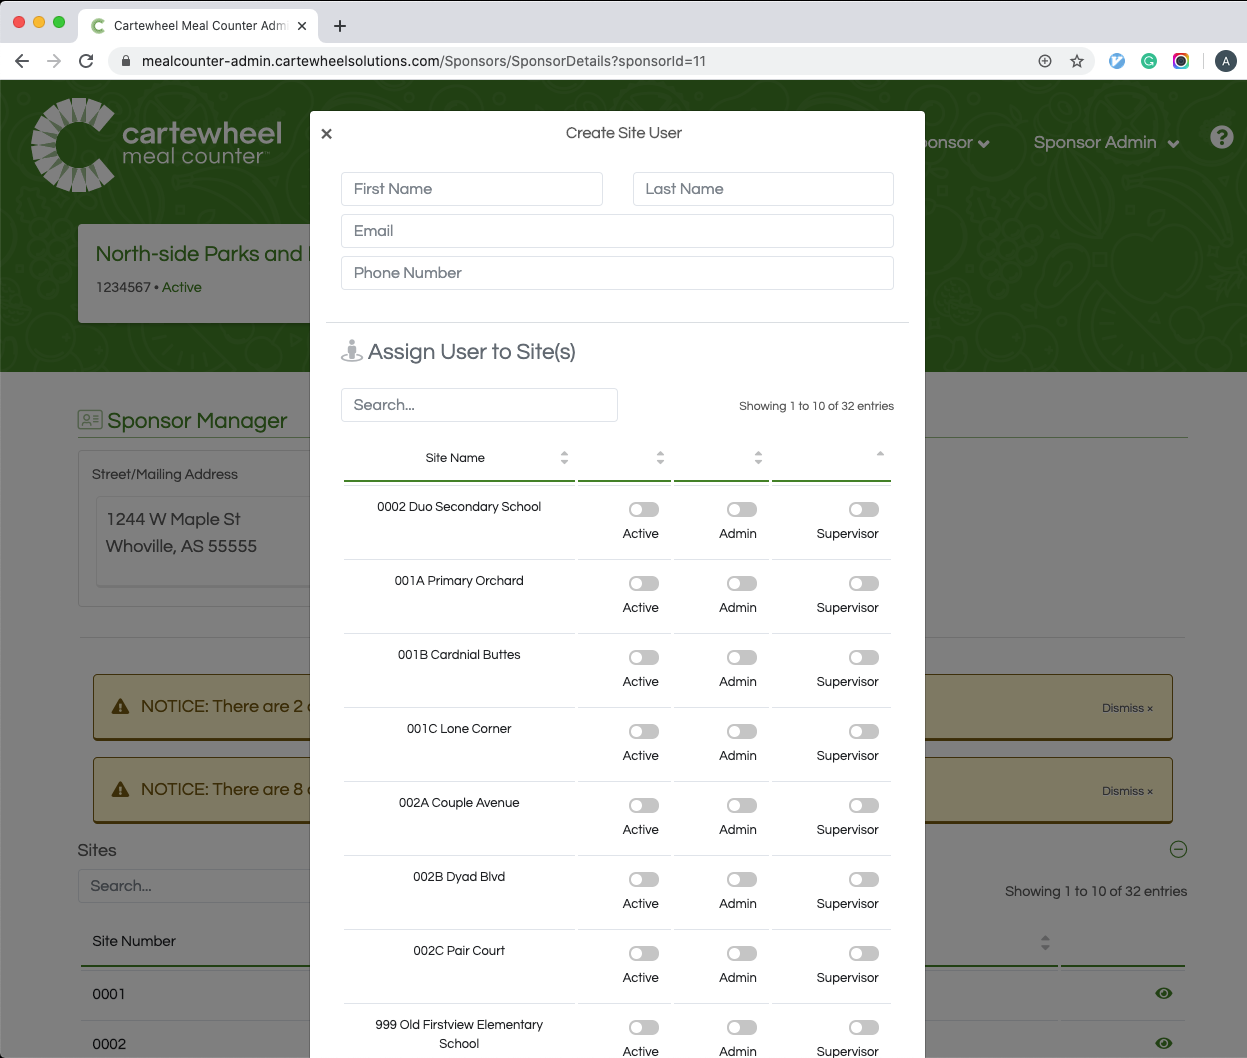
Click on the 'Add Site User' button at the bottom of the section to open the 'Create Site User' screen.
Here, you can enter the user's name, email, and phone number and grant them access to sites by role. Please note, you can assign one user to multiple sites without leaving this screen. Please note, each site should only have one user designated as its 'Supervisor,' their contact information will appear in the 'Not Reported' page.
Editing Site Users
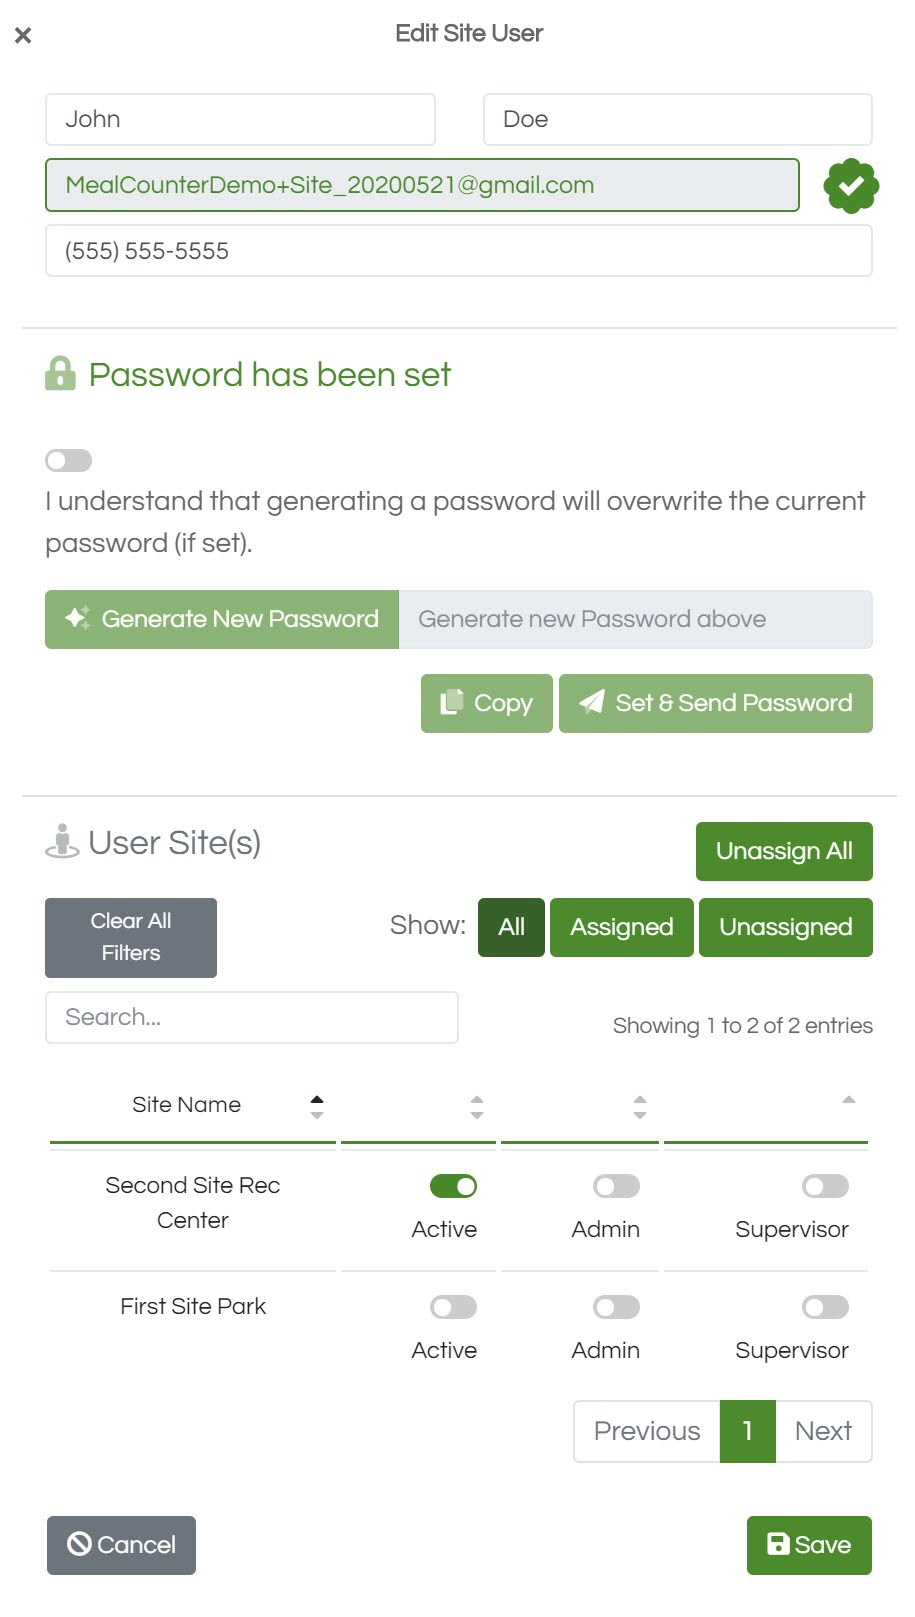
Selecting an existing user will allow you to edit their user details, password, or site assignments.
-
Click into a field to edit a user's name, phone number, or, in the case it has not been confirmed yet, email address.
-
Toggle 'Active' status and grant 'Admin' or 'Supervisor' permissions using the list of sites.
-
Users having difficulty receiving their confirmation email or otherwise setting their password can have one set for them by a Sponsor. Once a new password is generated, you must click 'Set & Send Password' to complete the process.